RBMS Configuration Store
The RBMS resource inventory includes a configuration store to maintain switch configurations. The configuration store can store an arbitrary number of configurations per switch and provides a history of up to 50 revisions for each configuration.
RBFS stores the active configuration in RBMS after every configuration change.
The figure below shows the configuration lifecycle.

A new configuration is considered a candidate configuration. A candidate configuration turns into the active configuration when being applied to the switch. The previously activate configuration is marked as superseded at the same time. A superseded configuration can be restored by creating a new candidate configuration from it and applying the candidate configuration again. Candidate and superseded configurations can be removed from the configuration store. The active configuration cannot be deleted.
RBMS provides means to create or upload new configurations and apply them to the switch. In addition, RBMS UI allows inspecting configuration changes in the configuration history.
Creating a new candidate configuration
Uploading a candidate configuration
The simplest way to add a new candidate configuration is to upload a new configuration to the configuration store.
To upload a new candidate configuration
-
Click the Inventory tab.
-
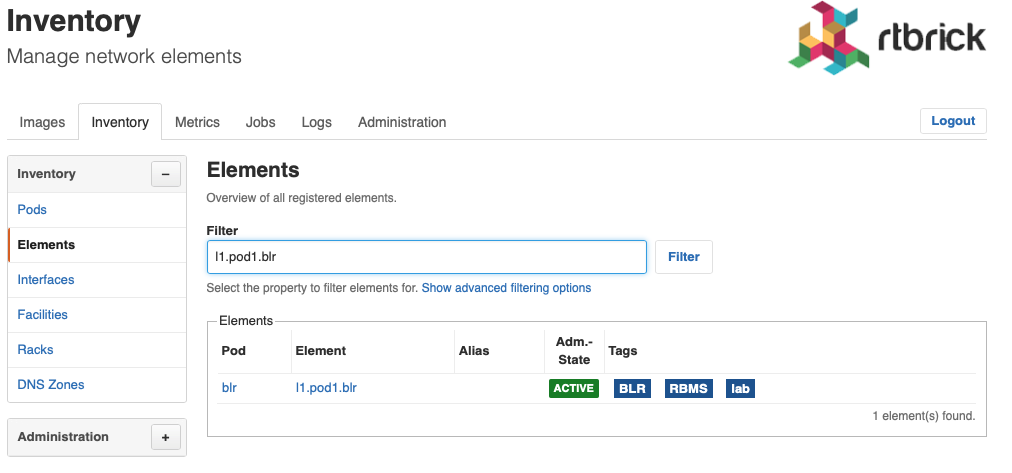
Click Elements in the left navigation pane. The element list appears.
-
Click the element name for which you want to upload a new configuration.
-
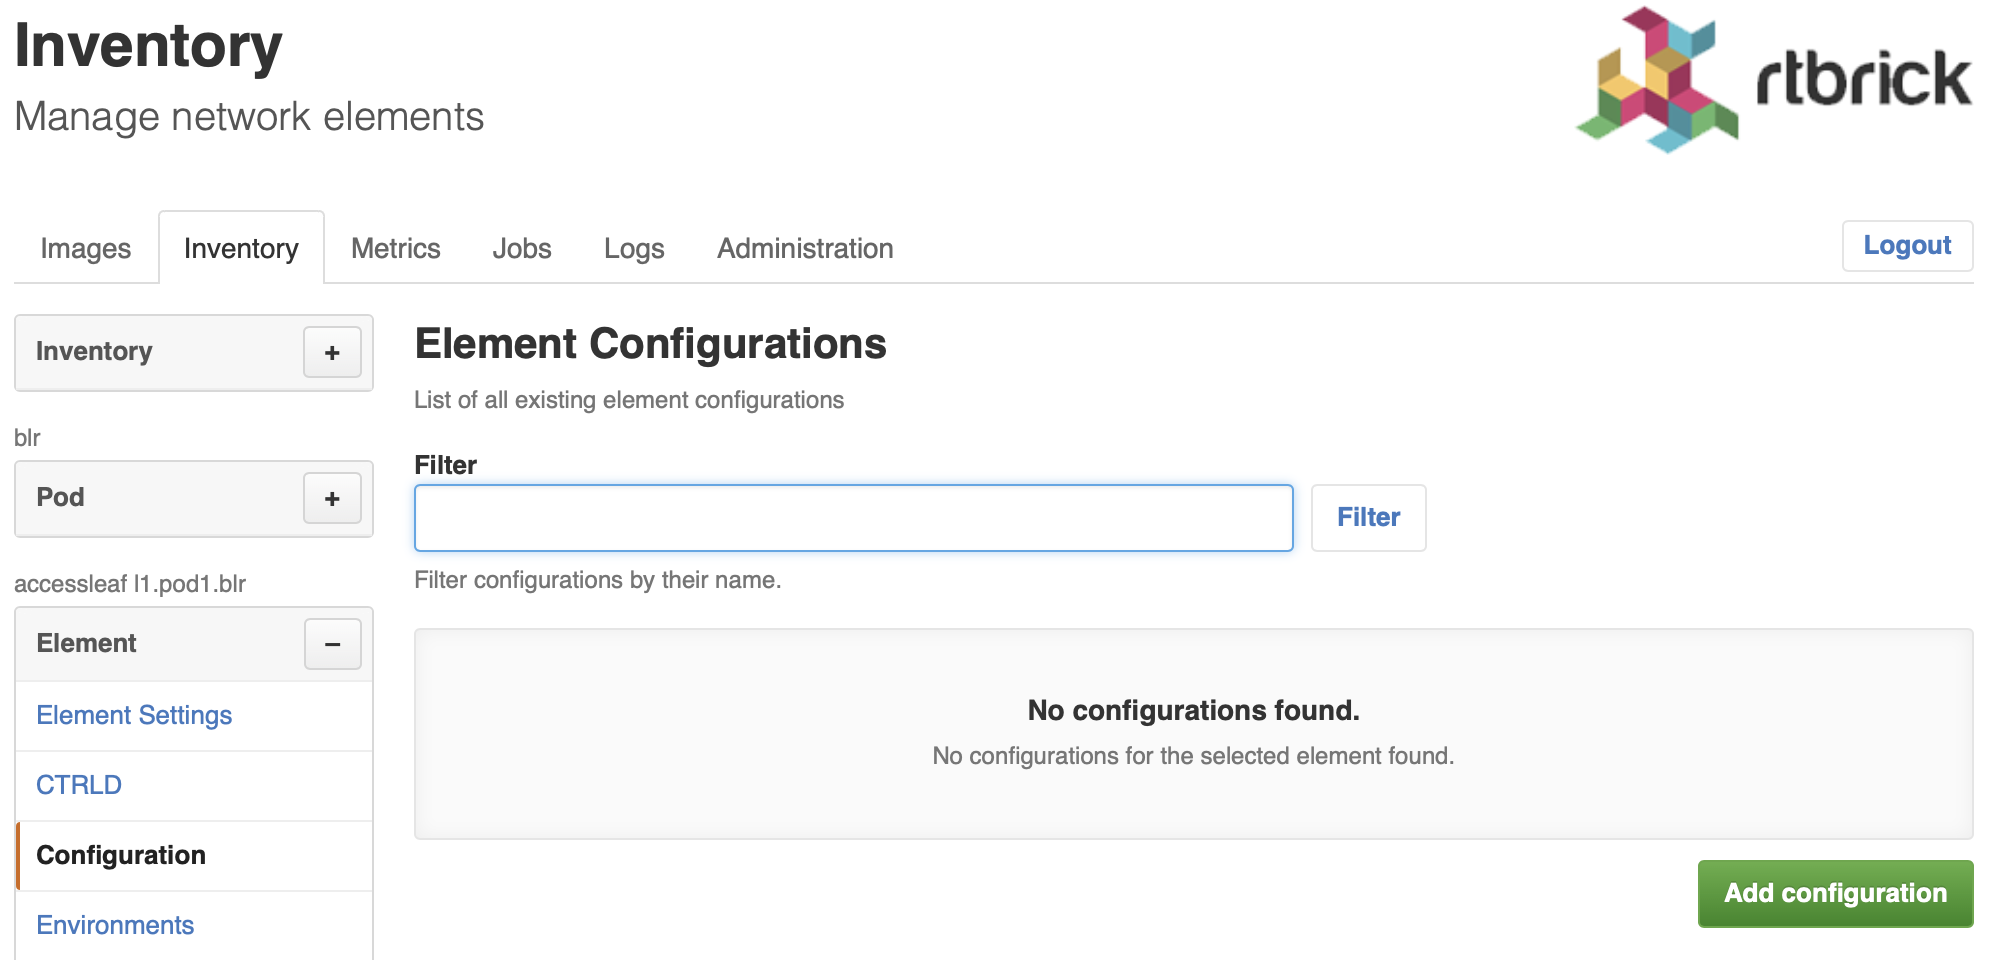
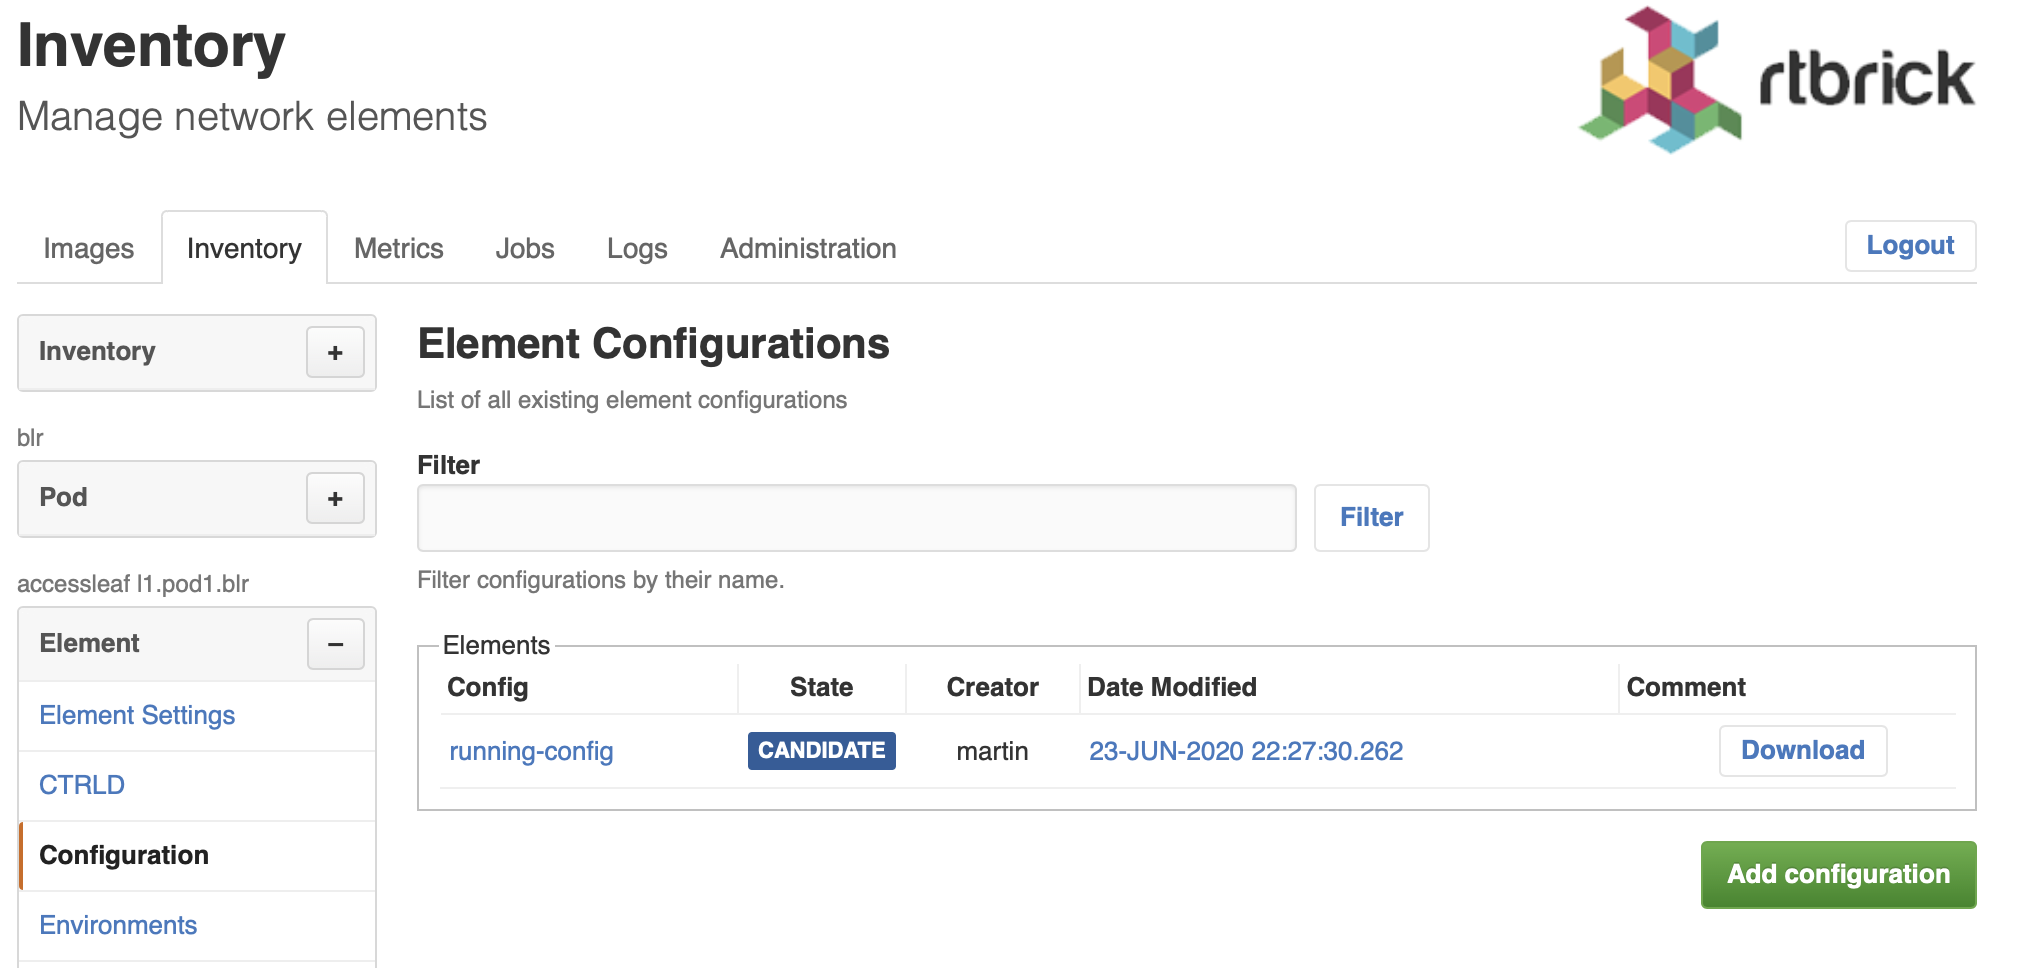
Click Configuration in the left navigation pane. The configurations list appears.
-
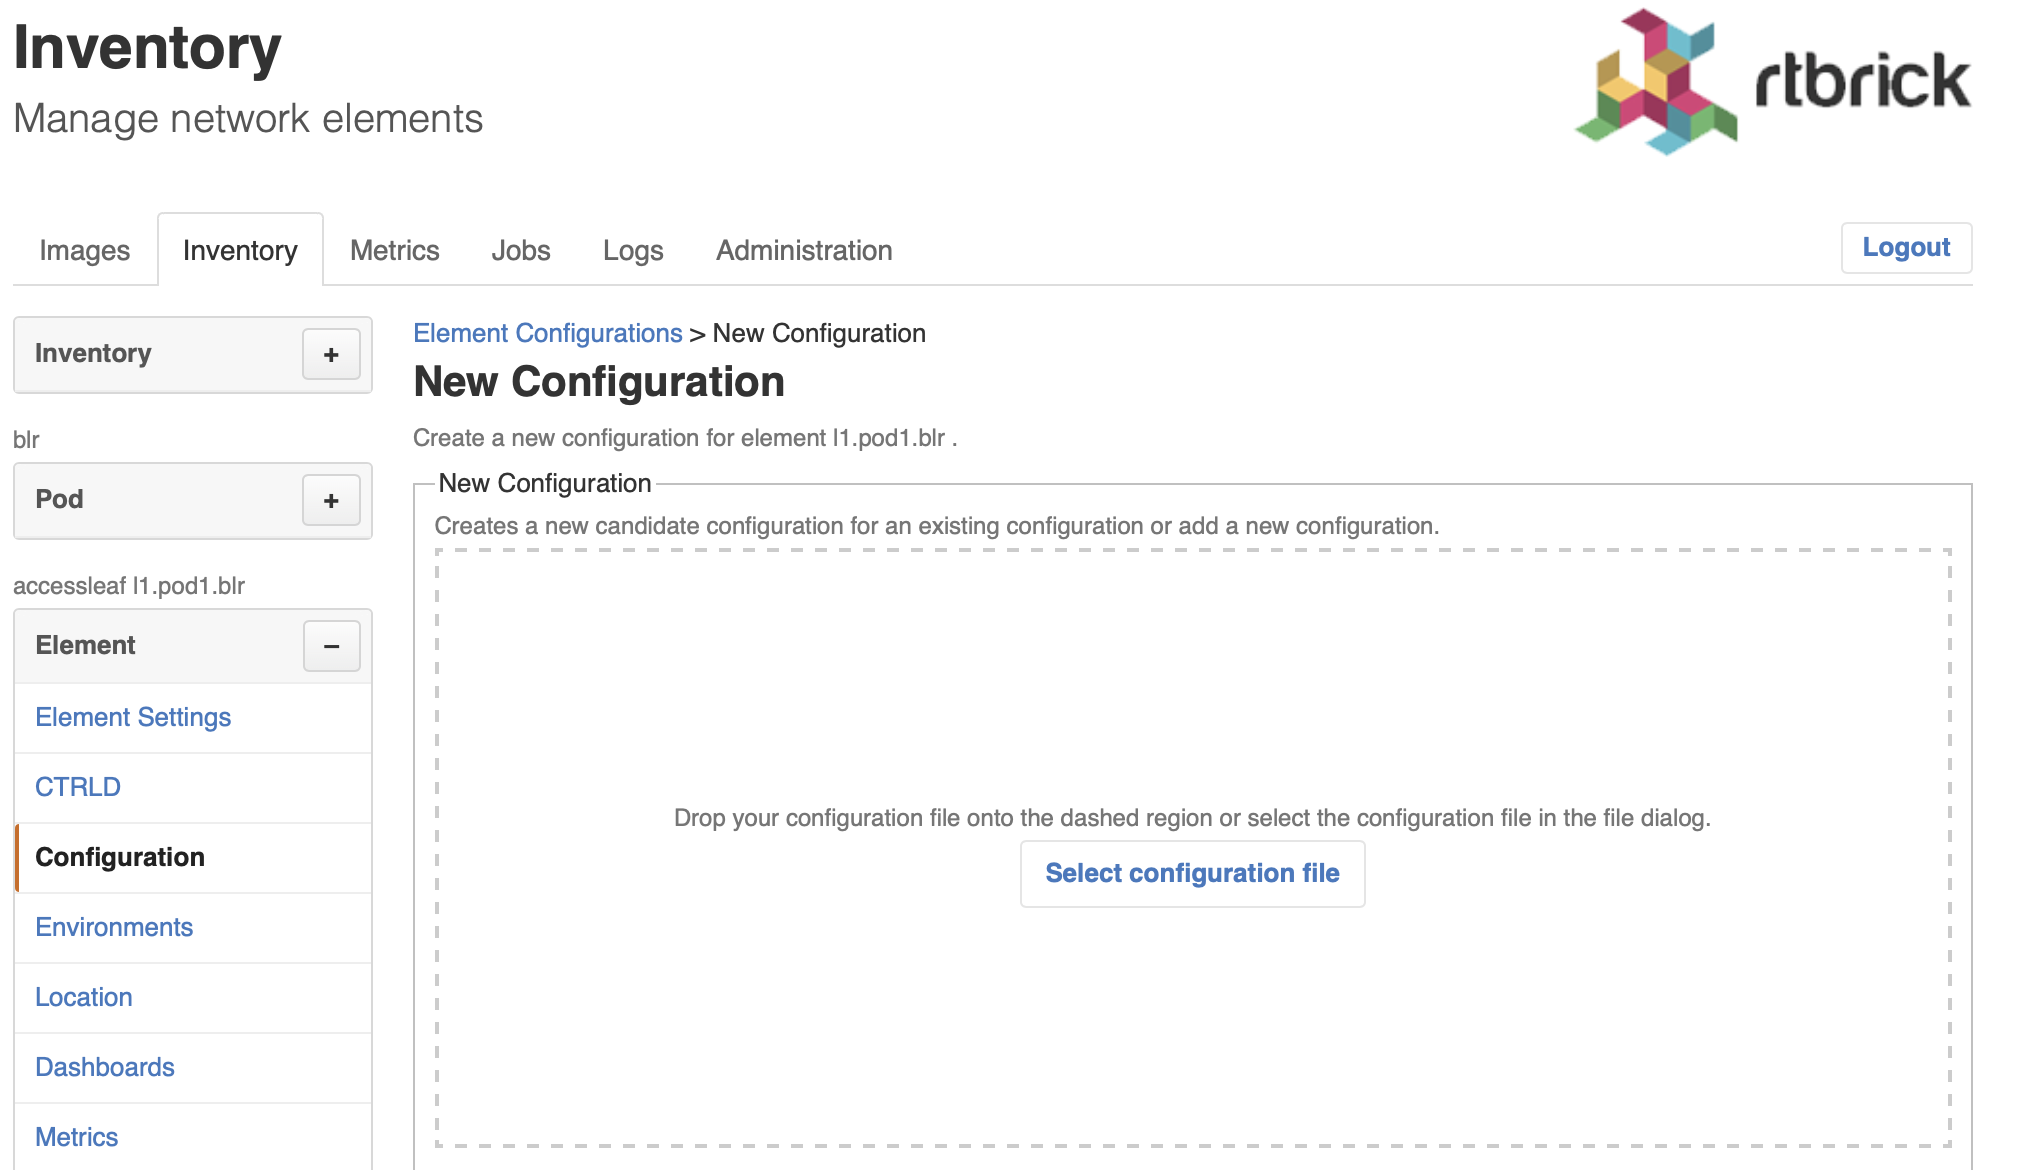
Click Add configuration. The New Configuration page appears.
-
Drop a configuration file onto the dashed area or click Select configuration file to open the file dialog to select a file.
-
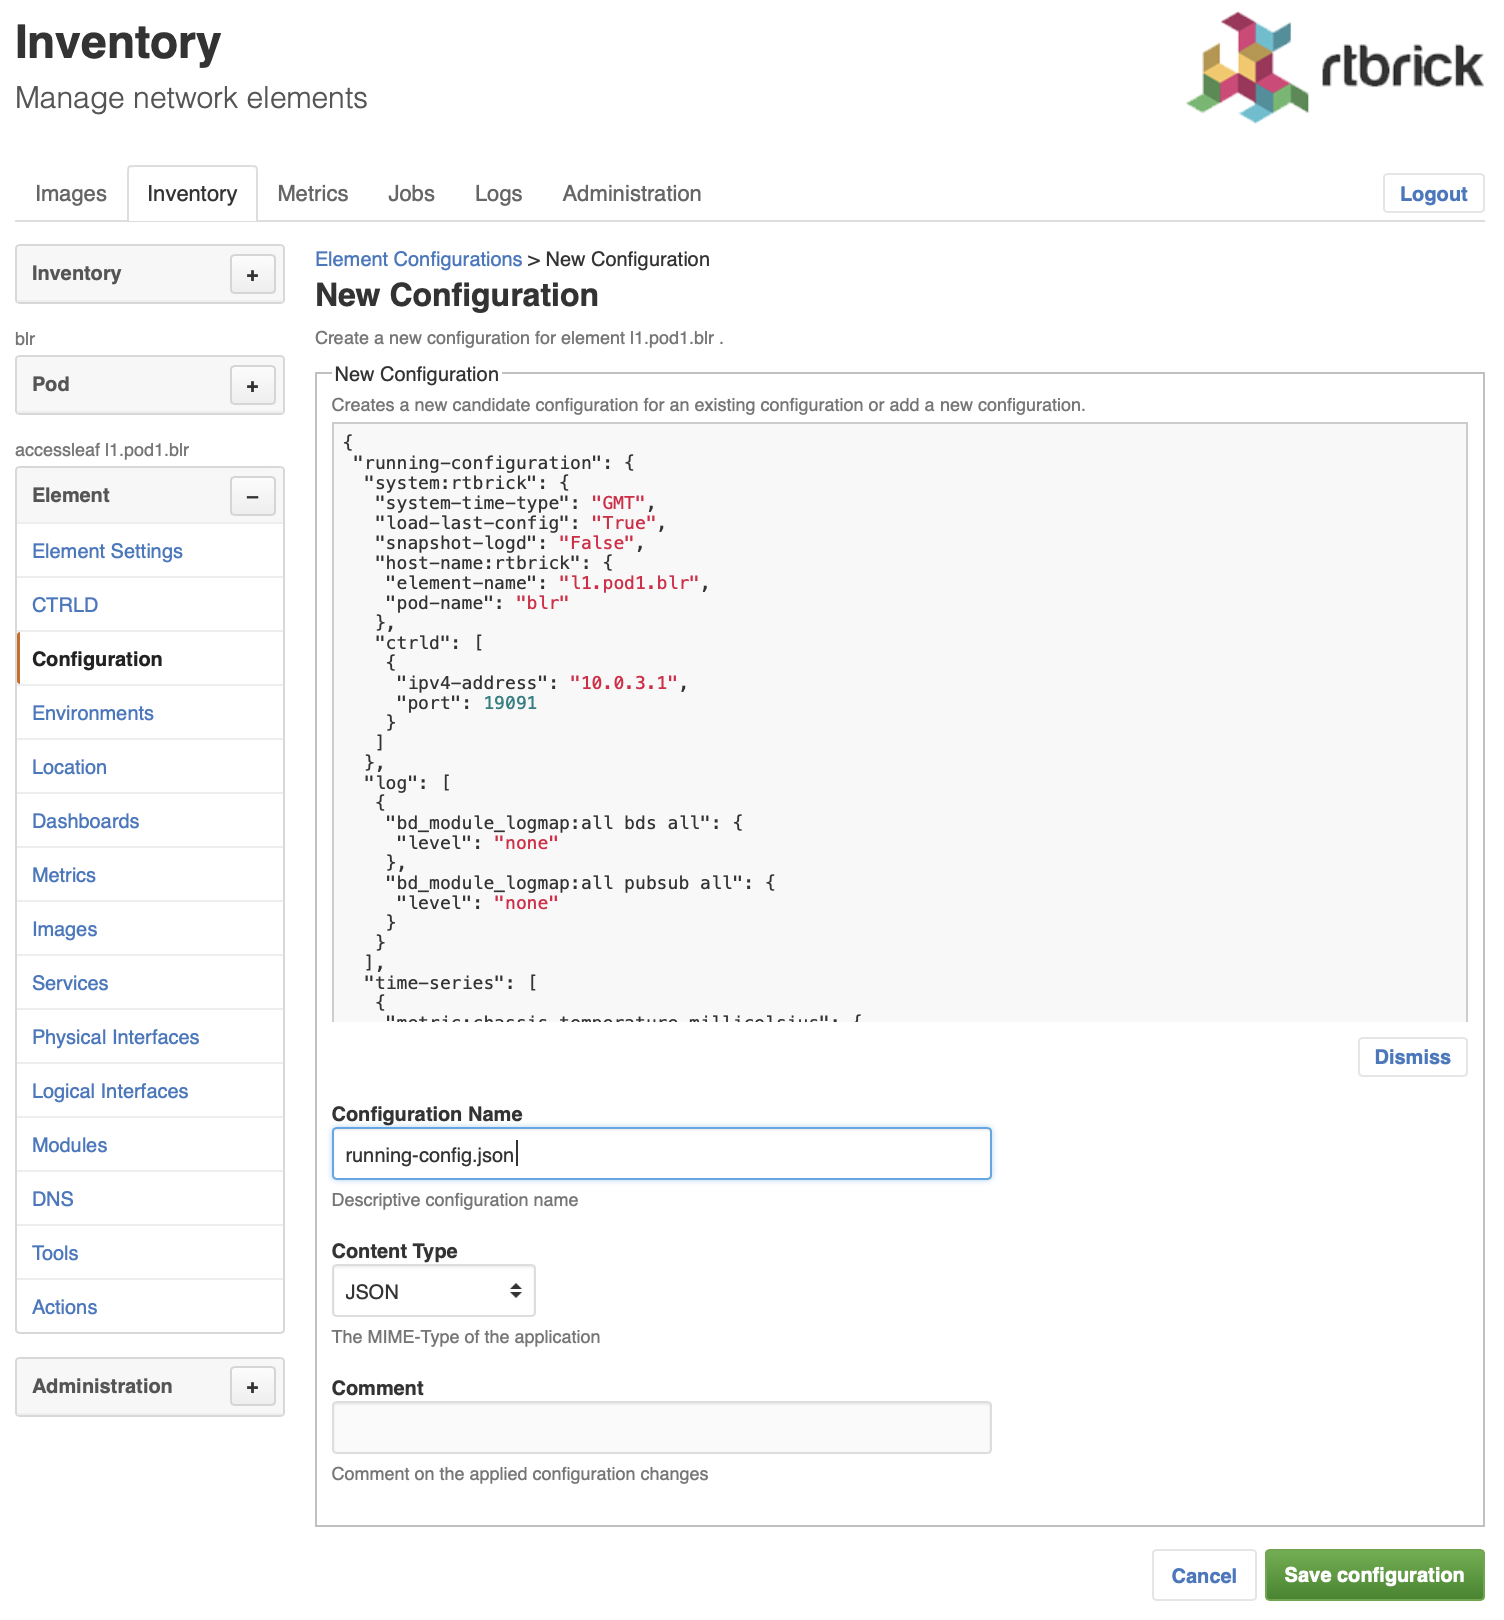
Review the configuration in the preview.
-
In Configuration Name, enter the switch configuration name. By default the configuration name is taken from the file name.
-
Check whether the selected Content Type is correct.
-
Optionally comment the configuration.
-
Click Save configuration to add the candidate configuration.
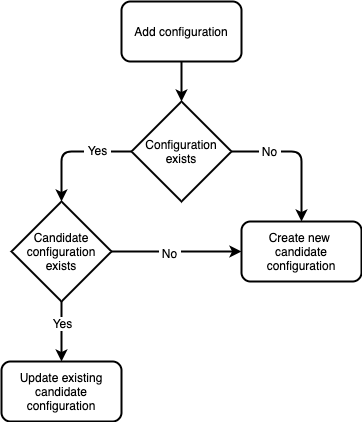
RBMS either creates a new candidate configuration or updates an existing candidate configuration if a candidate configuration for the specified configuration name exists. The complete flow is illustrated below:
Generating a candidate configuration
RBMS includes a template engine to generate switch configurations. The configuration templates are designed based on your conventions for building a fabric and then added to the template engine. The templates need to be registered in RBMS to make them eligible for execution. RBMS passes the following information to the template engine:
-
the general element settings
-
the software image to be installed on the switch and
-
all registered environments
RBMS can store an arbitrary set of environments per element. An environment is a JSON object containing parameters processed in the template. The structure and number of environments is defined by the template author.
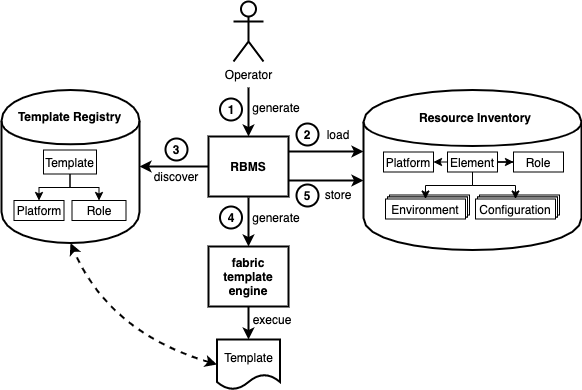
The figure below shows the configuration generation flow:
-
The operator triggers the switch configuration generation in RBMS.
-
RBMS loads the element settings, environments and image information from the resource inventory.
-
RBMS discovers the templates eligible for the selected switch.
-
RBMS invokes the template engine for each discovered template.
-
RBMS stores the generated configuration as candidate configuration in the configuration store.
Template registration
The template registration maintains the list of templates available in the template engine.
Say you have three different templates:
-
ztp.gojsongenerates the ZTP configuration snippet for a switch. -
leaf-running-configuration.gojsongenerates the running-configuration of a leaf switch. -
spine-running-configuraton.gojsongenerates the running-configuration of a spine switch.
All templates need to be registered in RBMS to get executed when the switch configuration is genereated.
To register a new template
-
Click the Inventory tab.
-
Click + to expand the Administration menu.
-
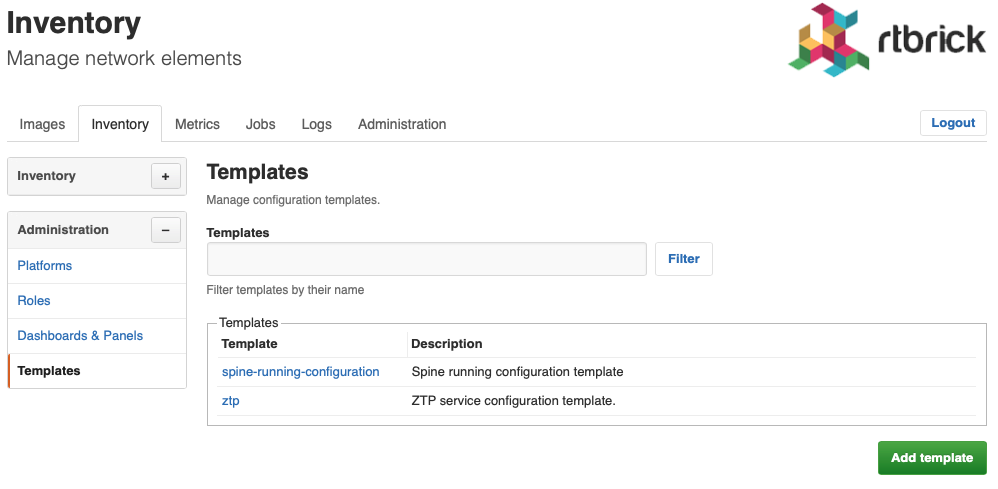
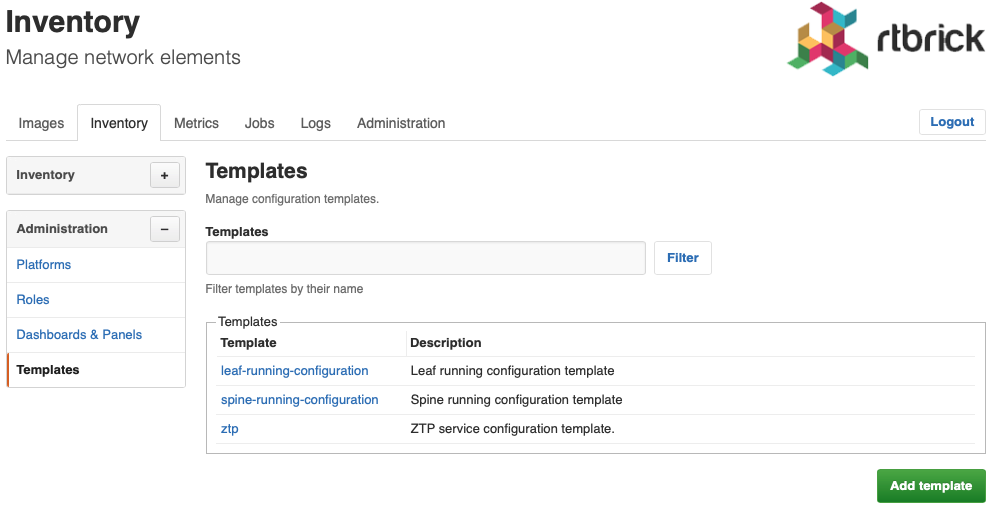
Click Templates in the left navigatio pane. The template list appears. ZTP and spine templates are already registered.
-
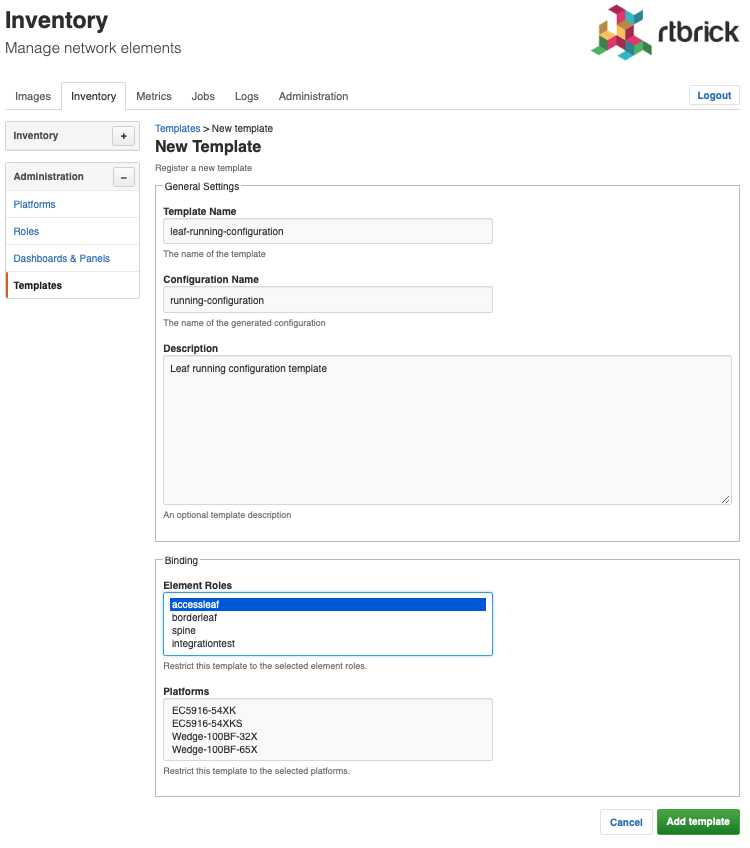
Click Add template to register the leaf template.
-
In Template Name, enter leaf-running-configuration.
| The template name in RBMS matches the template folder name in the template engine. See the template engine guide for more details. |
-
In Configuration Name, enter running-configuration since the template generates the running-configuration for a switch.
-
In Element Roles, select accessleaf to bind the template to accessleaf switches.
-
In Description, optionally describe the template and the generated configuration.
-
Click Save template. The template list appears. The new template is listed.
Environment management
Adding a new environment
To add a new environment
-
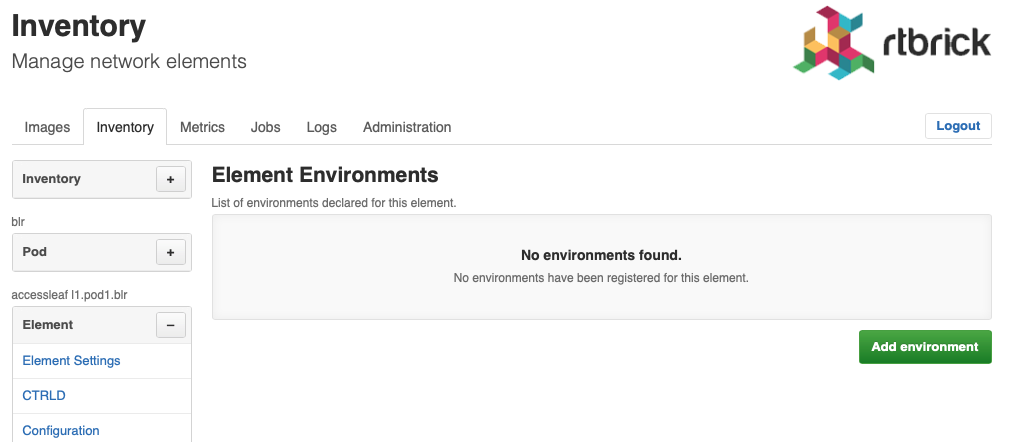
Click Environments in the left navigation pane. The list of environment appears.
-
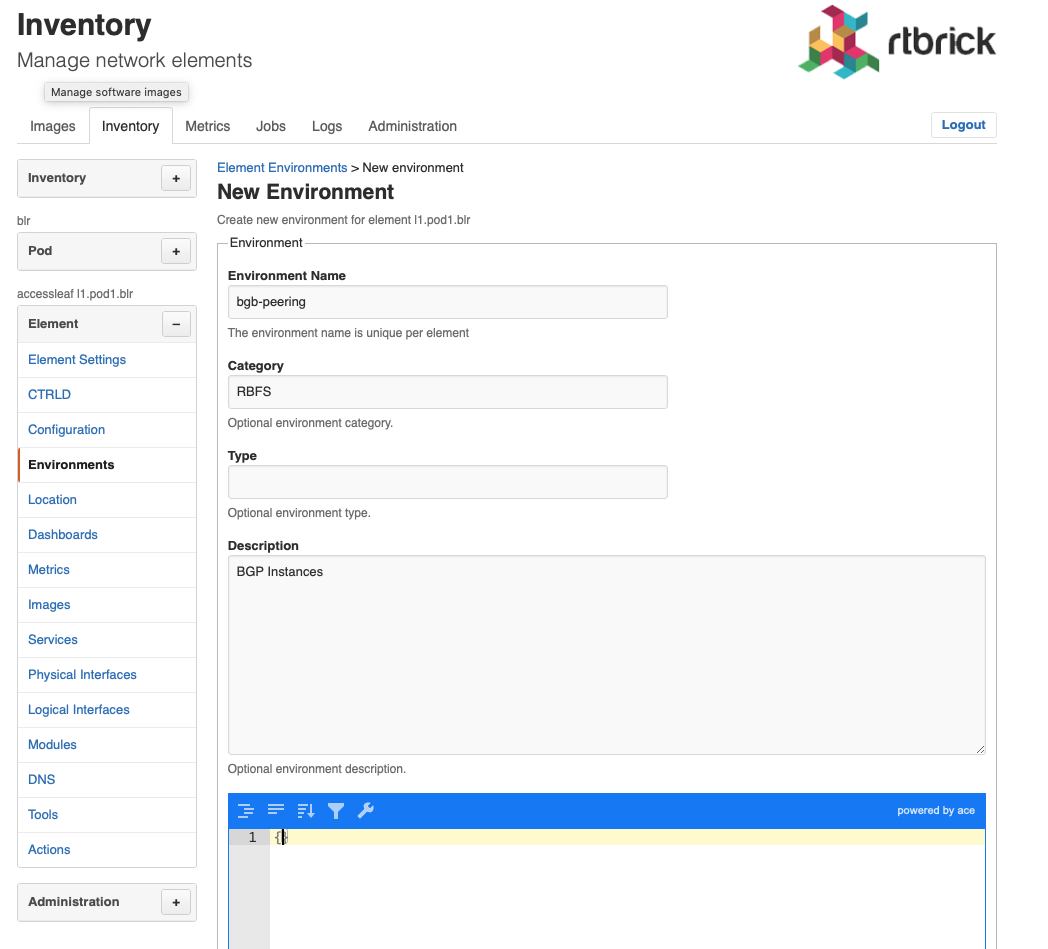
Click Add environment. The New Environment view appears.
-
In Environment Name enter the name of this environment.
-
In Category enter RBFS.
| Only RBFS environments are processed by the template engine. |
-
In Type enter an optional type or schema information of the environment.
-
In Description enter an optional environment description.
-
Enter the environment variables in the displayed JSON editor or click Upload new environment to upload a JSON file.
-
Click Add environment to add a new environment.
Configuration generation
To generate a configuration
-
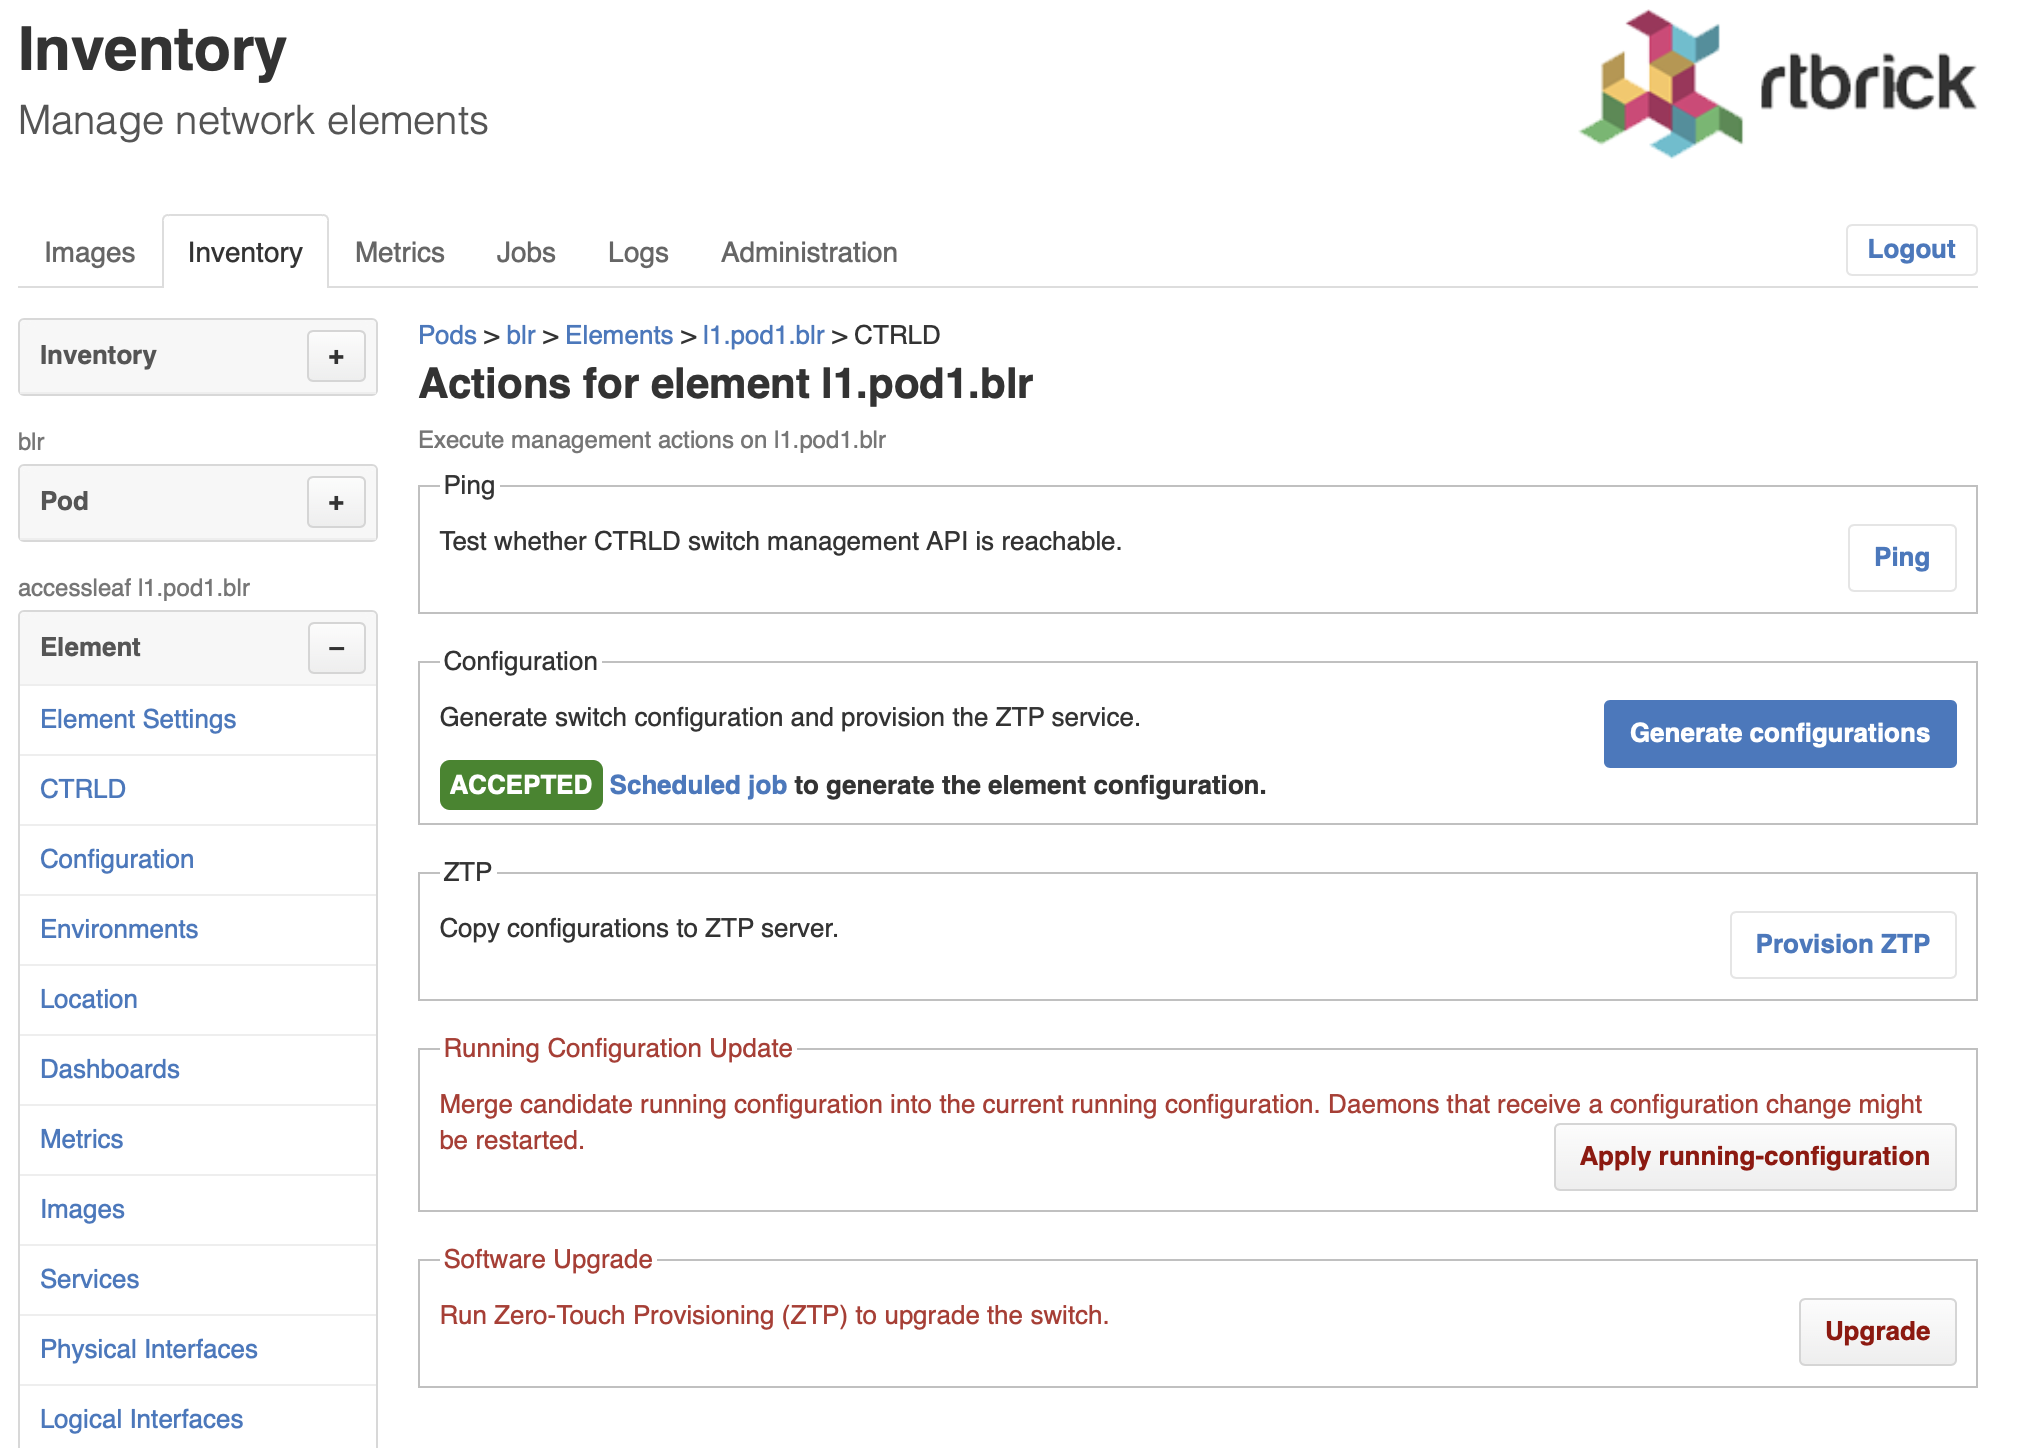
Click Actions in the left navigation pane.
-
Click Generate configurations. RBMS schedules a configuration generation job. The job contains a task for each configuration and invokes the template engine to create the configuration.
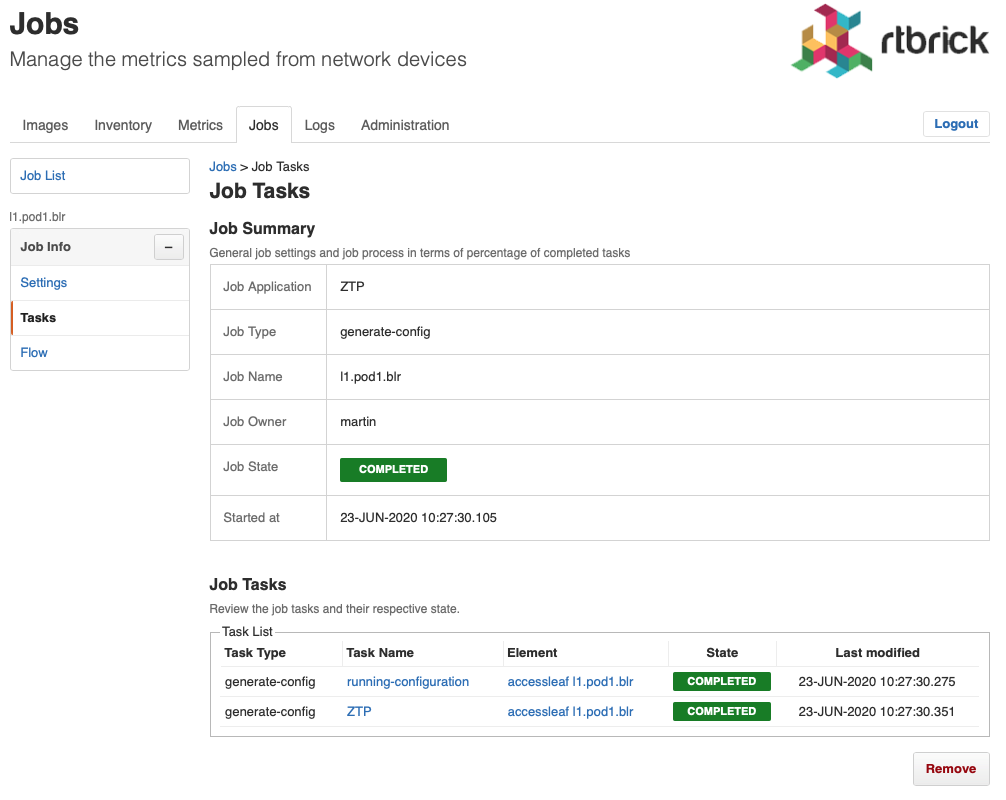
| The generated configurations are stored as new candidate configurations. |
To review the generated configuration
-
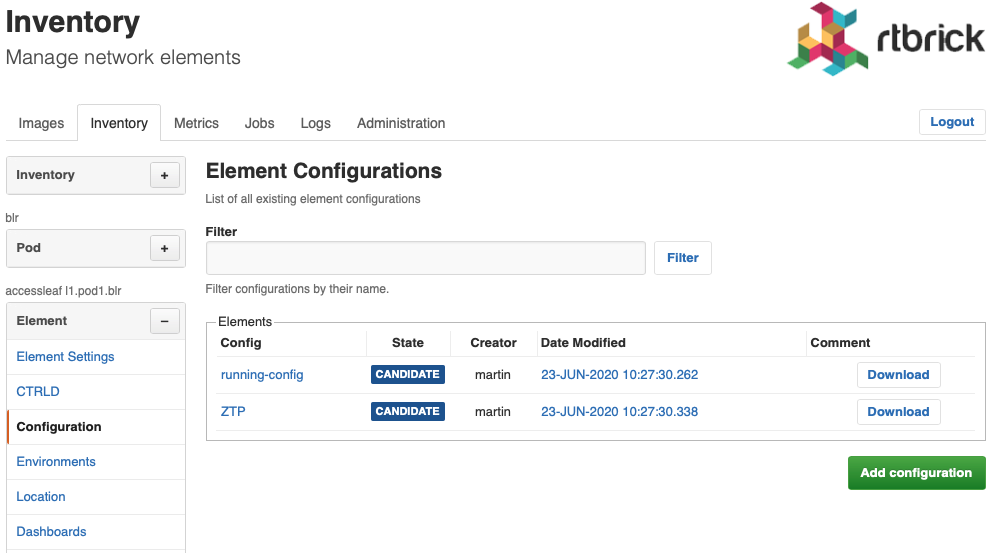
Click Configuration in the left navigation pane. The configuration list shows new candidate configurations.
-
Click the timestamp of the generated configuration to show the configuration content. Click the configuration name to display the configuration history.
Review configuration history
To review configuration changes in the configuration history
-
Click the Inventory tab. The list of pods appears.
-
Click Element in the left navigation pane. The element list appears.
-
In Filter enter the name of the switch and click Filter. The list of matching elements appears.

-
Click the element name for which you want to inspect configuration changes. The element settings appears.
-
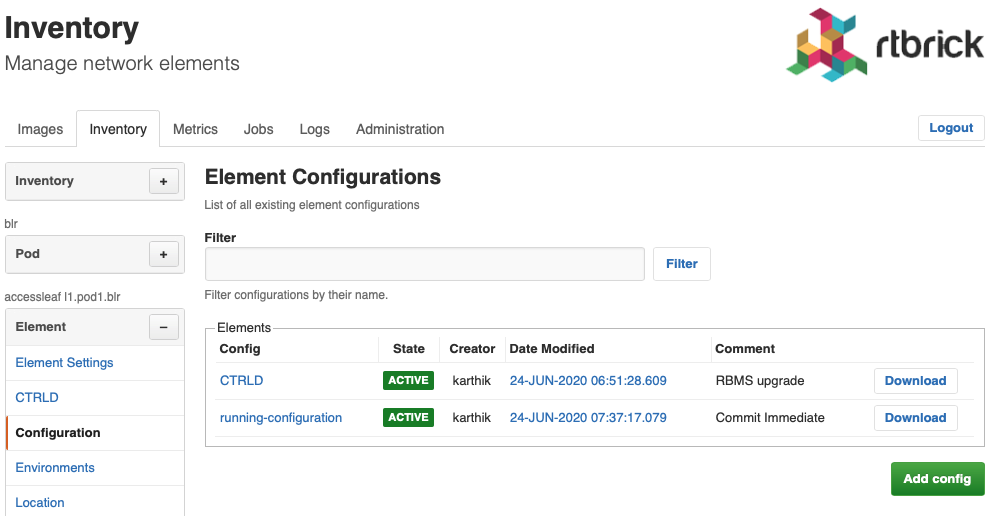
Click Configurations. The list of configurations appears.
-
Click the configuration name. The configuration history appears.
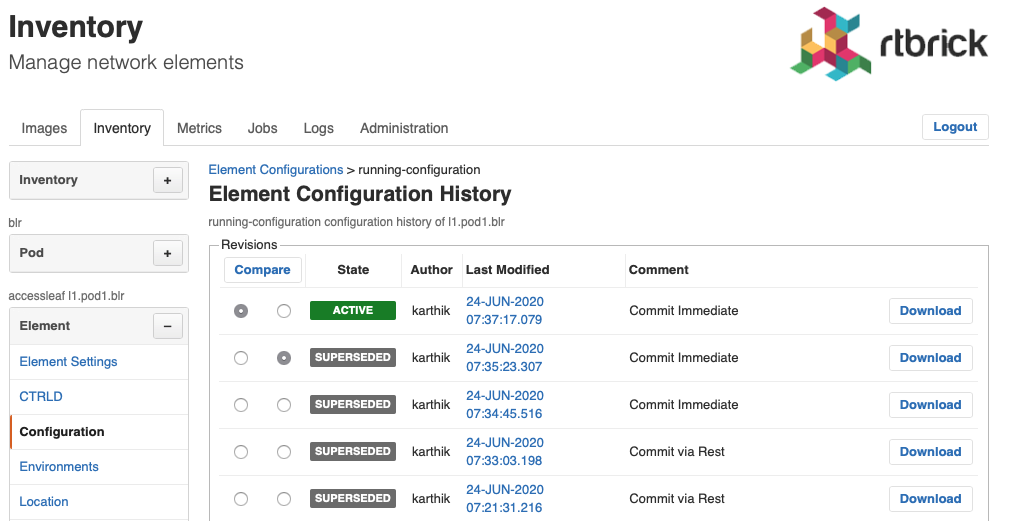
-
Select the two configurations you want to compare and click the Compare button. The diff viewer appears.
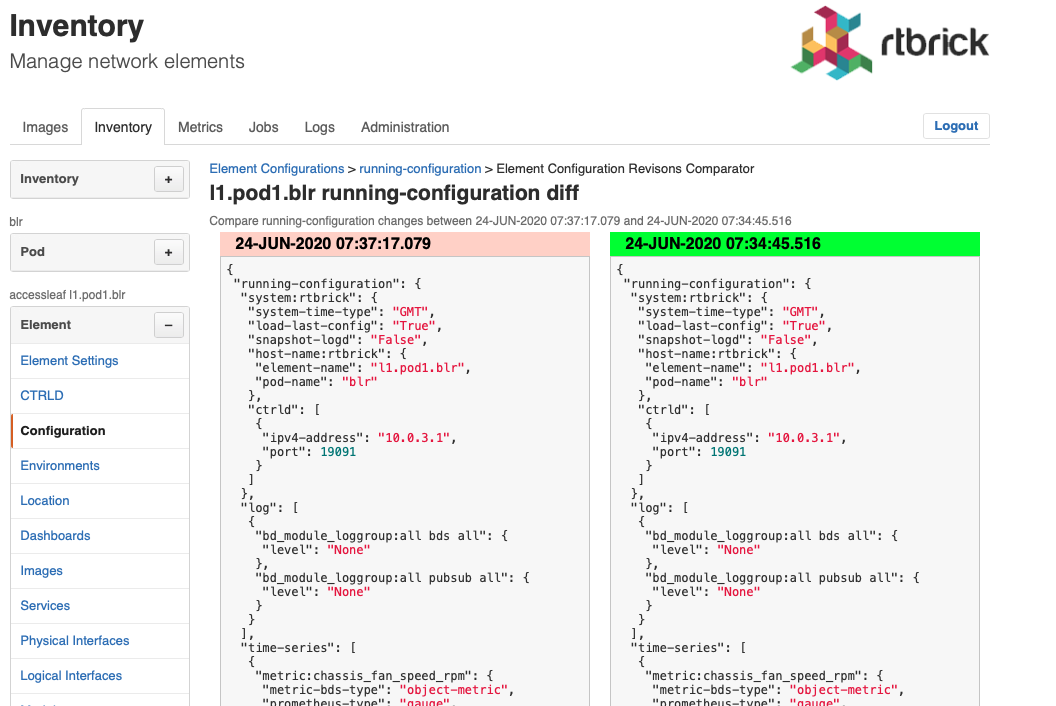
The diff viewer shows both configurations and the diff if you scroll down.
