BNG Blaster
BNG Blaster is an open-source network tester for access and routing protocols developed by RtBrick and specifically designed to test and validate the performance, scalability, and reliability of BNG devices. It can emulate a huge amount of PPPoE and IPoE (DHCP) subscribers including IPTV, and L2TP (LNS). There are various routing protocols supported like ISIS and BGP. Thus, you can use the software for end-to-end BNG and non-BNG router testing.
Features
Here are some key features and capabilities of BNG Blaster:
-
Performance Testing: BNG Blaster can simulate a large number of subscriber connections and generate high traffic loads to test the capacity and performance of BNG devices. It helps assess how well the BNG handles traffic under various scenarios.
-
Scalability Testing: By creating a massive number of simulated subscribers, BNG Blaster allows network operators to test the scalability limits of their BNG devices. This helps ensure that the BNG can handle the expected growth in subscriber numbers without degradation in performance.
-
Realistic Traffic Generation: BNG Blaster can generate realistic traffic patterns and emulate various protocols, such as DHCP (Dynamic Host Configuration Protocol), PPPoE (Point-to-Point Protocol over Ethernet), and IP routing protocols. This enables comprehensive testing of BNG behavior in real-world scenarios.
-
Failure and Resiliency Testing: BNG Blaster can simulate network failures, link outages, and other adverse conditions to evaluate the resilience of BNG devices. This helps identify potential weaknesses and ensures that the BNG can handle failures gracefully.
-
Centralized Management: BNG Blaster provides a centralized management interface that allows users to configure test parameters, monitor test progress, and collect performance metrics from multiple BNG devices simultaneously. It streamlines the testing process and enhances overall efficiency.
Using BNG Blaster
The first step is to download and install the BNG Blaster onto a system that meets the tool’s system requirements. The software is free of charge and can be downloaded from https://github.com/rtbrick/bngblaster/releases. Once the software is installed, testing includes the following steps:
-
Network Setup: Connect your devices under test (DUT) to the BNG Blaster and ensure appropriate setting of IP addresses and routing.
-
Test Configuration: Create a json configuration file defining the test scenarios (such as performance and scalability) and set the corresponding parameters.
-
Test Execution: Once the test configuration is complete, initiate the test execution. BNG Blaster will start generating traffic and sending it to the DUT. During the test, you can monitor the progress, observe performance metrics, and collect relevant data.
-
Test Analysis: After the test completes, analyze the results and performance metrics collected by BNG Blaster. Evaluate the performance of the DUT.
-
Reporting: Generate test reports summarizing the results and findings from the BNG Blaster tests. These reports can be useful for documentation, sharing insights with colleagues or stakeholders, and tracking the progress of network improvements.
Demo
In this section, let’s have a brief hands-on demo on how BNG Blaster works. The example works on a standalone device and we are using virtual interfaces for the sake of simplicity. The BNG Blaster is pre-installed on the service node (SN) in our virtual lab topology, so let’s login and create a pair of virtual interfaces:
student@tour:~$ rtb-ssh SN
Logging into SN as supervisor ...
Last login: Wed Jul 19 06:11:25 UTC 2023 on pts/5
Welcome to Ubuntu 18.04.6 LTS (GNU/Linux 5.15.0-75-generic x86_64)

 * Documentation:  https://help.ubuntu.com
 * Management:     https://landscape.canonical.com
 * Support:        https://ubuntu.com/advantage

+--------------------------------------------------------------------+
|                                                                    |
    System SN:
        Date:       Wed Jul 19 08:28:04 UTC 2023
        Uptime:     up 20 hours, 24 minutes

    Image metadata:
        UUID:       1cdf4b2e-b44d-40fd-ad9a-b1cff7b49281
        Version:    23.5.0-g4internal.20230504151525+Bservicenodepublic.C7c6c80eb
        Role:       service-node
        Platform:   virtual
        Format:     lxd
        Build date: 2023-05-04 15:15:25 UTC
        Based on:   Ubuntu 18.04.6 LTS
|                                                                    |
+--------------------------------------------------------------------+

supervisor@SN:~ $ sudo ip link add veth1.1 type veth peer name veth1.2
[sudo] password for supervisor:
supervisor@SN:~ $ sudo ip link set veth1.1 up
supervisor@SN:~ $ sudo ip link set veth1.2 up
The password for user supervisor is simply supervisor on the virtual training environment.
|
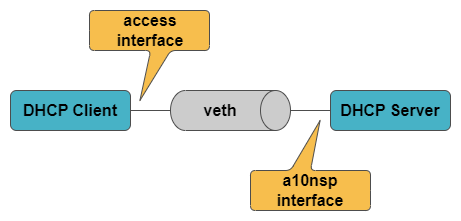
In our demo, we will use the BNG Blaster to emulate a DHCP client and DHCP server. Both are connected with each other via the newly created veth-interface. On the one end, we configure an access interface simulating IPoE subscribers, while on the remote end an a10nsp interface is configured. The a10nsp interface is useful in this scenario as it emulates a lightweight DHCP server which accepts every session.
All we need to get the test running is a BNG Blaster configuration file defining both interfaces and the corresponding protocols. BNG Blaster configuration files are written in json-format.
{
    "interfaces": {
        "a10nsp": [                            (1)
            {
                "__comment__": "DHCP Server",
                "interface": "veth1.1"
            }
        ],
        "access": [                            (2)
            {
                "__comment__": "DHCP Client",
                "interface": "veth1.2",
                "type": "ipoe",
                "ipv6": false,
                "outer-vlan-min": 1,
                "outer-vlan-max": 4000,
                "inner-vlan": 7,
                "stream-group-id": 1
            }
        ]
    },
    "dhcp": {                                  (3)
        "enable": true,
        "broadcast": false
    },
    "session-traffic": {
        "ipv4-pps": 1
    },
    "streams": [                               (4)
        {
            "stream-group-id": 1,
            "name": "Stream_1",
            "type": "ipv4",
            "direction": "both",
            "priority": 128,
            "length": 256,
            "pps": 1,
            "a10nsp-interface": "veth1.1"
        }
    ]
}| 1 | The a10nsp section defines the interface veth1.1 as type a10nsp. |
| 2 | The access section defines all the access interfaces, e.g., veth1.2. The access interface configuration also contains the access type (ipoe) and the vlan settings (e.g., vlan ranges for inner and outer vlan). |
| 3 | The access protocol is defined to be dhcp(v4). |
| 4 | In addition to session setup, traffic will be sent between client and server. Therefore, a stream-group is defined and associated. The stream-group configuration also contains details of the traffic and the target interface. |
Now we can start the BNG Blaster with this configuration:
supervisor@SN:~ $ sudo bngblaster -C quickstart.json
Jul 19 08:52:12.421090 All network interfaces resolved
Jul 19 08:52:12.424845 ALL SESSIONS ESTABLISHED
Jul 19 08:52:13.754602 ALL STREAM TRAFFIC FLOWS VERIFIED
Jul 19 08:52:13.754643 ALL SESSION TRAFFIC FLOWS VERIFIED
After pressing Ctrl+c, the test should be stopped and a detailed report printed.
There are many options available for the BNG Blaster CLI which you can find in the documentation. We would like to highlight only two options at this point, the -I knob to start an interactive user interface and the -c <#> option to define the number of emulated subscribers, e.g.,
supervisor@SN:~ $ sudo bngblaster -C quickstart.json -c 5 -I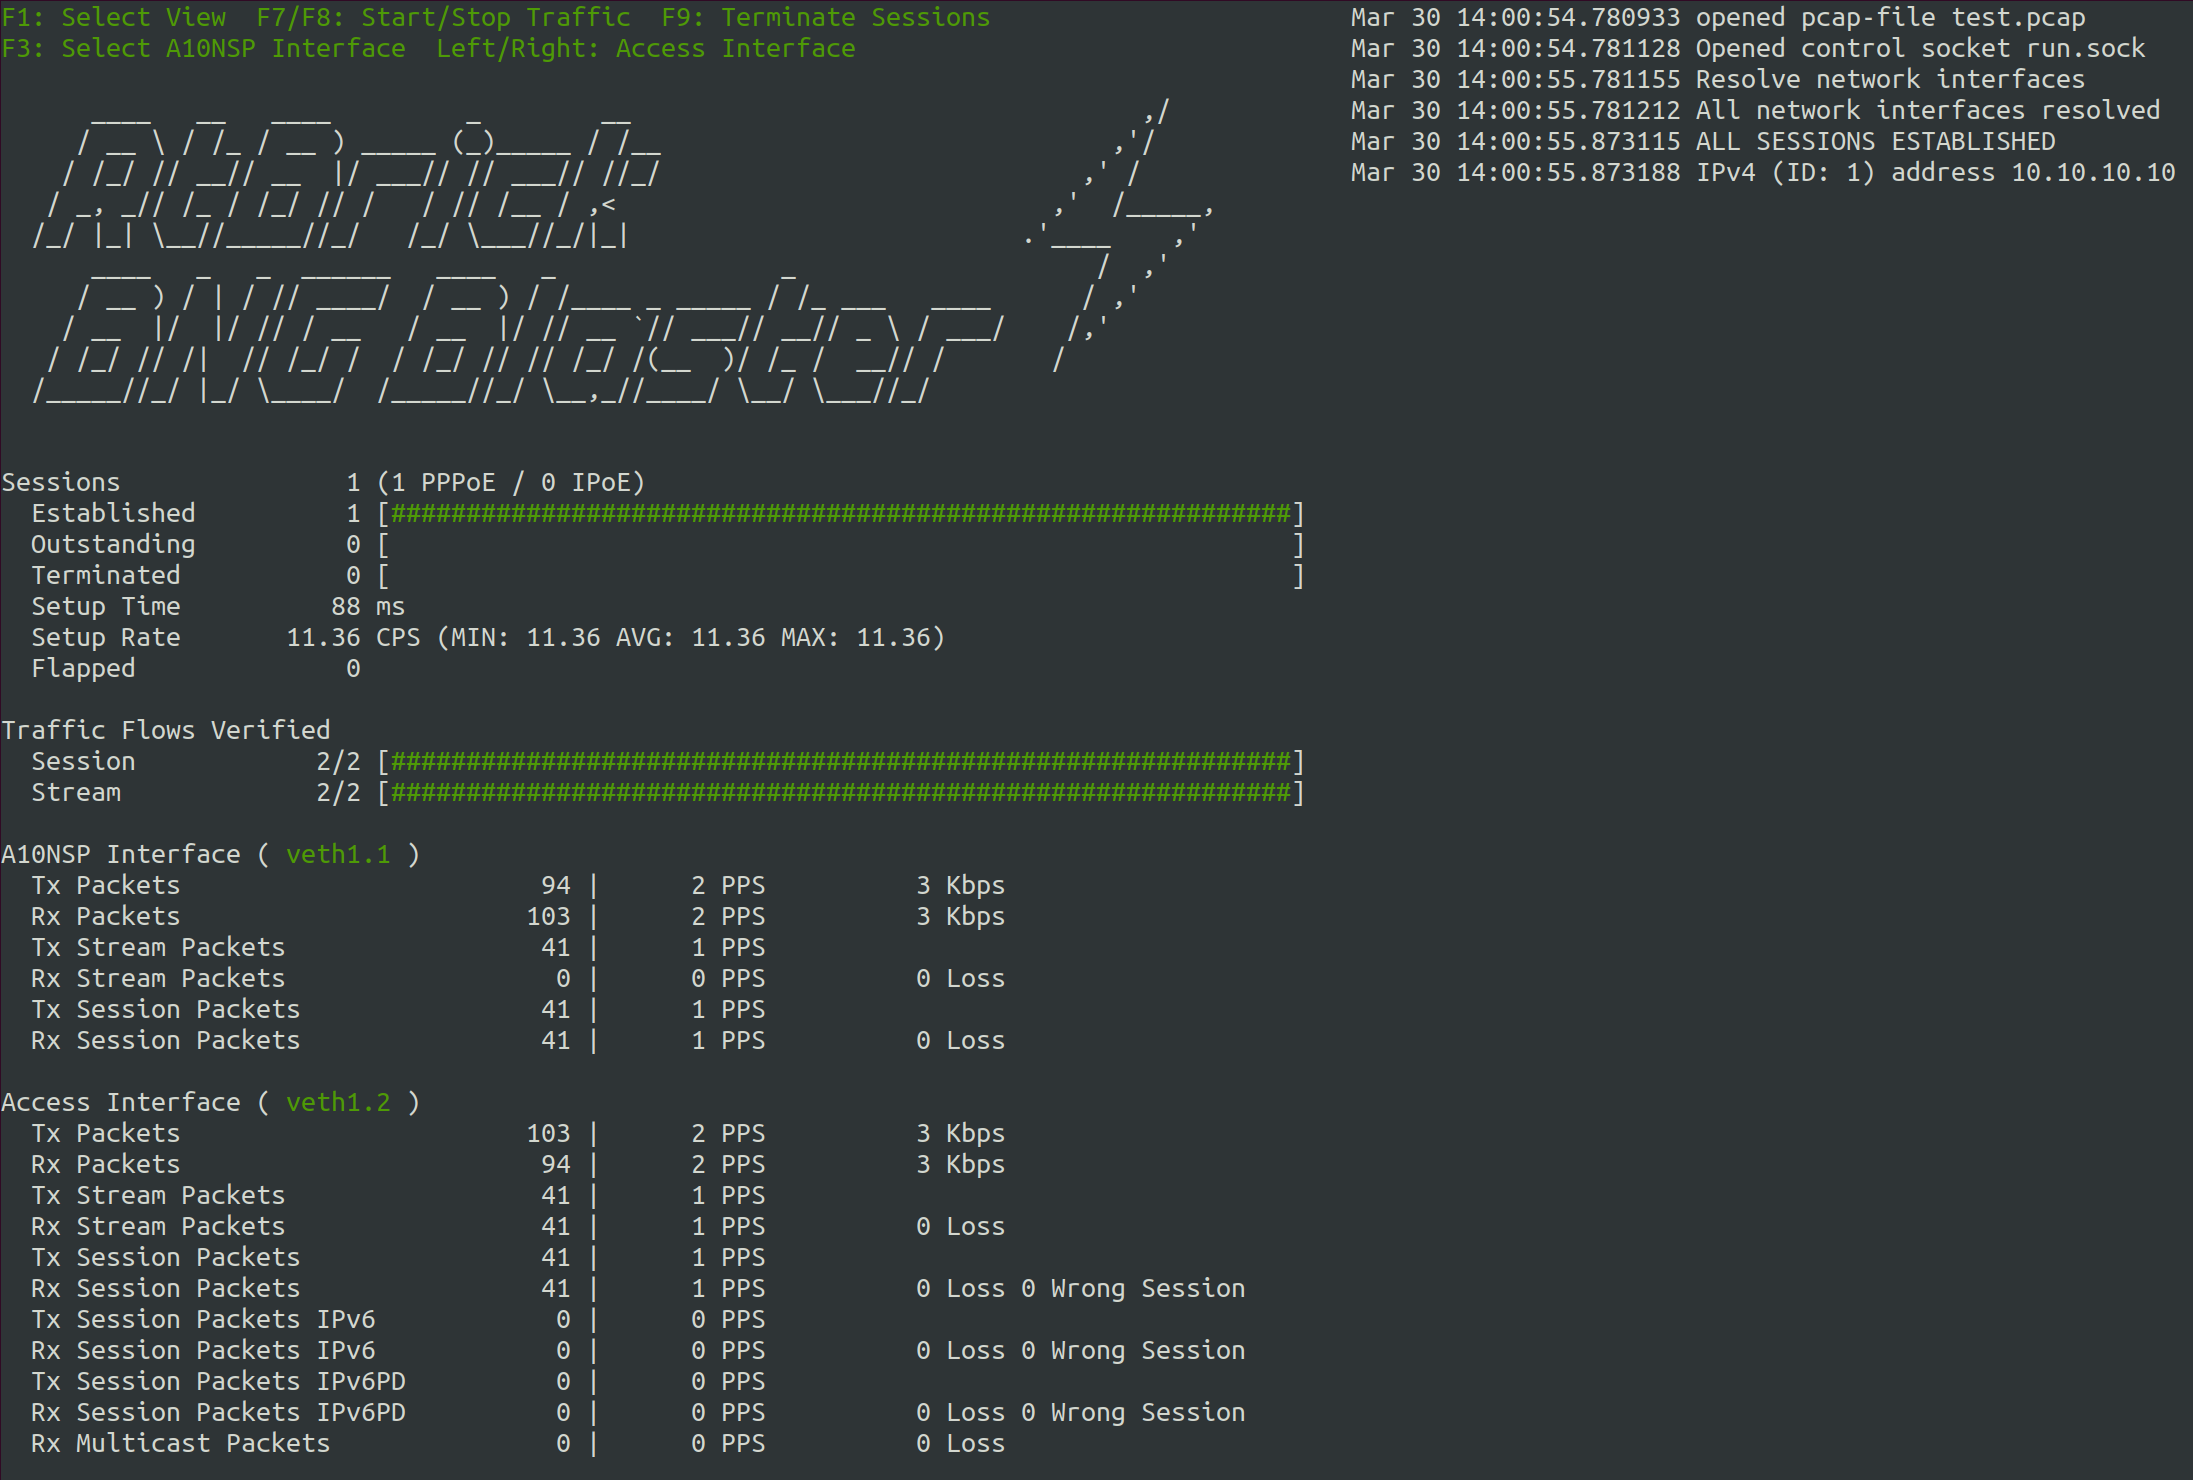
The BNG Blaster interactive session is terminated using the F9 button.
For more details refer to the BNG Blaster Documentation.