1. Overview
This document provides guidance to validate IPoE implementation using the RBFS Consolidated BNG (C-BNG). The guide contains quick information about general platform configuration, configuration of various access and routing protocols, subscriber management, Quality of Service (QoS) and troubleshooting. The document presents a single use case scenario and provides information specifically on how to validate this particular implementation and for more information on any specific application, refer to https://documents.rtbrick.com/.
This guide is not intended to be an exhaustive guide of all RBFS features and does not provide information on features such as Multicast, Lawful Intercept etc.
1.1. About the RBFS Consolidated BNG
The RtBrick C-BNG is delivered as a container, running on Open Network Linux (ONL) provided by the hardware ODM manufacturers. Platforms that support C-BNG include Edgecore AGR 400, CSR 320, and UfiSpace S9600. The RtBrick C-BNG software runs on powerful bare-metal switches as an open BNG.
The BNG is designed to dynamically deliver the following services:
-
Discovering and managing subscriber sessions for IPoE subscribers
-
Providing authentication, authorization and accounting (AAA)
The basic C-BNG architecture for IPoE subscribers is shown in Fig. 1.

Fig. 1: Topology setup with C-BNG as a DUT (device under test) connected to BNG Blaster.
In this topology:
-
The Service Node is an Ubuntu server on which a new container is spawned with the associated interfaces for running BNG Blaster tests.
-
Rtbrick’s homegrown BNG Blaster emulates both the routing and access functions and, in effect, tests the DUT.
-
The topology emulates IPoE subscribers and traffic between RBFS switch and the core network.
-
The objective of this topology is to demonstrate complete IPoE subscriber emulating and service along with routing to connect to the network uplink.
-
R-1, R-2 and RR are simulated using BNG Blaster. The
C-BNGforms an IS-IS L1 adjacency with the BNG blaster to discover R-1, R-2, and RR. The RR is the route reflector that replays a full internet feed of IPv4 and IPv6 addresses, in total about 1.1 million prefixes. R-2 is the nexthop for all internet routes. -
Through DCHP, an IPv4 address needs to be assigned to the out-of-band management port.
1.2. Deployment
A C-BNG provides BNG functionality on a single bare-metal switch and eliminates the need to have a chassis based system. It provides a low footprint and optimal power consumption based on BRCM chipsets, a compelling value proposition that has complete BNG and routing feature support.
C-BNG runs on small form-factor temperature hardened hardware that allows deployments in street site cabinets.
The rtbrick-toolkit is a meta package that can be used to install all the tools needed to work with RBFS images (container or ONL installer) and the RBFS APIs.
For more information, see RBFS and Tools Installation, and RBFS Licensing Guide.
1.3. Using the RBFS CLI
Connect to the C-BNG node.
$ ssh <C-BNG-management-ip> -l supervisor
supervisor@<C-BNG-management-ip>'s password:
The password for C-BNG-management-ip should be entered here.
As a result, the CLI prompt will look like this:
supervisor@rtbrick>C-BNG.rtbrick.net:~ $
Open the RBFS CLI.
supervisor@rtbrick>C-BNG.rtbrick.net:~ $ cli
The CLI has three different modes:
-
operationmode is a read-only mode to inspect and analyse the system state -
configmode allows modifying the RBFS configuration -
debugmode provides advanced tools for trouble-shooting
The switch-mode command allows switching between the different modes.
The show commands allow inspecting the system state.
The set and delete commands, which are only available in the configuration mode, allow modifying or deleting the current configuration. The commit command persists the changes. RBFS provides a commit history which allows reviewing changes (show commit log) and restoring a previous configuration (rollback). There are also commands to ping destinations, capture network traffic, save the configuration to or load the configuration from a file.
The CLI supports abbreviating commands, provides suggestions by hitting the [tab] key and displays a context help by entering a ?.
For more information on how to use the RBFS CLI, see the RBFS CLI User Guide.
2. Configuration and Settings
2.1. Platform Configuration and Settings
This section provides information about the platform and how to set various required configurations for the platform.
2.1.1. Know your Device
The configurations provided in this reference design document (C-BNG IPoE implementation) are generated on the UfiSpace S9600-72XC platform. The UfiSpace S9600-72XC is a multi-function, disaggregated white box aggregation routing platform that is equipped with Broadcom’s Qumran2c chipset. It features 64x25GE [1GbE/10GbE/25GbE] and 8x100GE [40GbE/100GbE] high-speed ports with a switching capacity of up to 2.4Tbs.
The RBFS C-BNG software is installed on top of the UfiSpace S9600-72XC.
|
|
Although the specific device used here is UfiSpace S9600-72XC, the configuration will stay exactly the same for any other device that supports the C-BNG image. |
For more information about the hardware specifications of UfiSpace S9600-72XC, see Hardware Specification.
2.1.2. Prerequisites
-
Access to BNG Blaster, an open-source network testing platform for access and routing protocols. For information on obtaining and building BNG Blaster, see https://rtbrick.github.io/bngblaster/.
-
Access to FreeRADIUS, a free RADIUS suite. For accessing FreeRADIUS, see https://freeradius.org/.
-
Access to Syslog server.
2.1.3. Restore Configuration
Depending on the deployment scenario, a running configuration can be applied or restored as needed.
To enable configuration restore, enter the set system load-last-config true command as shown below.
supervisor@rtbrick>C-BNG.rtbrick.net: cfg> set system load-last-config true
supervisor@rtbrick>C-BNG.rtbrick.net: cfg> commit
For more information, see section "2.3. Running Configuration" of the RBFS NOC Troubleshooting Guide.
2.2. General Configuration
To enable testing some basic primitives need to be configured. These general configurations include loopback interface for identifying and accessing the device on network, NTP for setting accurate time across a whole network of devices, TACACS+ for user authentication, user management for user configuration, license for accessing RBFS, Resmon for resource monitoring, and Syslog configurations for exporting the log message to the external log management server.
2.2.1. Configure License
Without any license installed on your system, you can evaluate RBFS for 7 days. You need to get an evaluation license or purchase an actual license within 7 days to use the full functionality of RBFS.
The following steps provide the commands to install an RBFS license key. For more information about license configuration, see Installing License.
Switch to config mode using the switch-mode config command to continue with the RBFS configurations.
supervisor@rtbrick>C-BNG.rtbrick.net: op> switch-mode config
supervisor@rtbrick>C-BNG.rtbrick.net: cfg>
Install the license encrypted string (that is received from RtBrick) using the RBFS CLI.
supervisor@rtbrick>C-BNG.rtbrick.net: cfg> set system license <license-key>
RBFS license configuration is shown below:
supervisor@rtbrick>C-BNG.rtbrick.net: op> show config system license
AAAAWsfg&jdkfs4D34H5@2evf...
As shown below, the "show system license" command displays the expiration date for the current license.
supervisor@rtbrick>C-BNG.rtbrick.net: op> show system license
License Validity:
  License index 1:
    Start date : Tue Feb 28 09:44:27 GMT +0000 2023
    End date   : Mon Mar 04 09:44:27 GMT +0000 2024
supervisor@rtbrick>C-BNG.rtbrick.net: op>
2.2.2. Configure Instance
Instance default will be available by default without any configurations.
Create the instance inband_mgmt by entering the following commands.
set instance inband_mgmt
set instance inband_mgmt address-family ipv4 unicast
commit
The configurations of the instance inband_mgmt are shown below.
supervisor@rtbrick>C-BNG.rtbrick.net: cfg> show config instance inband_mgmt
{
  "rtbrick-config:instance": [
    {
      "name": "inband_mgmt",
      "address-family": [
        {
          "afi": "ipv4",
          "safi": "unicast"
        }
      ]
    }
  ]
}
Below are the configurations available for the available instances.
supervisor@rtbrick>C-BNG.rtbrick.net: cfg> show instance detail
Instance: default
  Instance ID: 0
  State: Active
  AFI        SAFI             State
  ipv4       unicast          Active
  ipv4       multicast        Active
  ipv4       labeled-unicast  Active
  ipv6       unicast          Active
  ipv6       multicast        Active
  ipv6       labeled-unicast  Active
  mpls       unicast          Active
Instance: inband_mgmt
  Instance ID: 3
  State: Active
  AFI        SAFI             State
  ipv4       unicast          Active
2.2.3. Configure Loopback Interface
Loopback Interface configuration is required as it is the best way to identify a network device and is always reachable. Also, protocols use the loopback address to determine protocol-specific properties for the device.
The following steps provide the commands to configure the loopback interface. For more information about Loopback Interface configuration, see Interfaces User Guide.
Configure loopback interface on the device.
set interface lo-0/0/1 unit 0 address ipv4 192.0.2.64/32
set interface lo-0/0/1 unit 1 address ipv4 192.0.2.74/32
set interface lo-0/0/1 unit 2 instance inband_mgmt
set interface lo-0/0/1 unit 2 address ipv4 192.0.2.128/32
set interface lo-0/0/1 unit 3 instance inband_mgmt
set interface lo-0/0/1 unit 3 address ipv4 192.0.2.131/32
commit
|
|
The configuration commands should be followed by the commit command to save the configurations into the device.
|
supervisor@rtbrick>C-BNG.rtbrick.net: cfg> commit
Loopback Interface configuration is shown below:
supervisor@rtbrick>C-BNG.rtbrick.net: cfg> show config interface lo-0/0/1
{
  "rtbrick-config:interface": [
    {
      "name": "lo-0/0/1",
      "unit": [
        {
          "unit-id": 0,
          "address": {
            "ipv4": [
              {
                "prefix4": "192.0.2.64/32"
              }
            ]
          }
        },
        {
          "unit-id": 1,
          "address": {
            "ipv4": [
              {
                "prefix4": "192.0.2.74/32"
              }
            ]
          }
        },
        {
          "unit-id": 2,
          "instance": "inband_mgmt",
          "address": {
            "ipv4": [
              {
                "prefix4": "192.0.2.128/32"
              }
            ]
          }
        },
        {
          "unit-id": 3,
          "instance": "inband_mgmt",
          "address": {
            "ipv4": [
              {
                "prefix4": "192.0.2.131/32"
              }
            ]
          }
        }
      ]
    }
  ]
}
2.2.4. Configure IP Addresses for Core Interfaces
Enter the following commands to configure IP addresses for the core interfaces.
set interface ifp-0/1/31 unit 10
set interface ifp-0/1/31 unit 10 vlan 10
set interface ifp-0/1/31 unit 10 address ipv4 192.0.2.1/27
set interface ifp-0/1/31 unit 10 address ipv6 2001:db8::1/64
set interface ifp-0/1/31 unit 100
set interface ifp-0/1/31 unit 100 vlan 100
set interface ifp-0/1/31 unit 100 address ipv4 192.0.2.33/27
set interface ifp-0/1/31 unit 200
set interface ifp-0/1/31 unit 200 instance inband_mgmt
set interface ifp-0/1/31 unit 200 vlan 200
set interface ifp-0/1/31 unit 200 address ipv4 192.0.2.97/27
commit
Below configuration shows the IP address configurations for the core interfaces.
{
    "rtbrick-config:interface": [
      {
        "name": "ifp-0/1/31",
        "unit": [
          {
            "unit-id": 10,
            "vlan": 10,
            "address": {
              "ipv4": [
                {
                  "prefix4": "192.0.2.1/27"
                }
              ],
              "ipv6": [
                {
                  "prefix6": "2001:db8::1/64"
                }
              ]
            }
          },
          {
            "unit-id": 100,
            "vlan": 100,
            "address": {
              "ipv4": [
                {
                  "prefix4": "192.0.2.33/27"
                }
              ]
            }
          },
          {
            "unit-id": 200,
            "instance": "inband_mgmt",
            "vlan": 200,
            "address": {
              "ipv4": [
                {
                  "prefix4": "192.0.2.97/27"
                }
              ]
            }
          }
        ]
      }
    ]
  }
}
2.2.5. Configure Static Routes to Enable Reachability to the NTP and TACACS Servers
Below are static routes configured to enable reachability to the NTP (192.0.2.129) and TACACS (192.0.2.130) servers. On the Service Node, 192.0.2.98 is the interface address on VLAN 200. It is explained later in this document how to configure IP addresses on Service Node. For details, see section 3.4.2, “Configuring Interfaces on the Service Node for NTP and TACACS Connectivity from C-BNG”.
set instance inband_mgmt static route ipv4 192.0.2.129/32 unicast np1
set instance inband_mgmt static route ipv4 192.0.2.130/32 unicast np1
set instance inband_mgmt static nexthop-profile np1
set instance inband_mgmt static nexthop-profile np1 nexthop 192.0.2.98
set instance inband_mgmt static nexthop-profile np1 lookup-instance inband_mgmt
set instance inband_mgmt static nexthop-profile np1 lookup-afi ipv4
set instance inband_mgmt static nexthop-profile np1 lookup-safi unicast
commit
The configuration of the static routes is shown below:
supervisor@rtbrick>C-BNG.rtbrick.net: cfg> show config instance inband_mgmt static
{
  "rtbrick-config:static": {
    "route": {
      "ipv4": [
        {
          "prefix4": "192.0.2.129/32",
          "safi": "unicast",
          "nexthop-profile": "np1"
        },
        {
          "prefix4": "192.0.2.130/32",
          "safi": "unicast",
          "nexthop-profile": "np1"
        }
      ]
    },
    "nexthop-profile": [
      {
        "name": "np1",
        "nexthop": "192.0.2.98",
        "lookup-instance": "inband_mgmt",
        "lookup-afi": "ipv4",
        "lookup-safi": "unicast"
      }
    ]
  }
}
2.2.6. Configure NTP
Configuring NTP (Network Time Protocol) provides time synchronization across a whole network of devices. An NTP network consists devices (clients) which are to be synchronized with the NTP server that provides accurate time to the client devices.
The following steps provide the commands to configure Network Time Protocol (NTP) for the device. For more information about NTP configuration, see NTP User Guide.
Enabling NTP Service:
To access the NTP service running in the ONL, this service has to be enabled in inband-management. On configuring this, the hosts reachable in inband instance via the physical interface can access this service.
Configure NTP server and NTP service on the device.
set system ntp server ntp1
set system ntp server ntp1 ipv4-address 192.0.2.129
set inband-management instance inband_mgmt
set inband-management instance inband_mgmt ntp true
commit
NTP configuration is shown below:
supervisor@rtbrick>C-BNG.rtbrick.net: cfg> show config inband-management
{
    "rtbrick-config:inband-management": {
      "instance": [
        {
          "name": "inband_mgmt",
          "ntp": "true"
        }
      ]
    }
  }
supervisor@rtbrick>C-BNG.rtbrick.net: cfg> show config system ntp
{
    "rtbrick-config:ntp": {
      "server": [
        {
          "server-name": "ntp1",
          "ipv4-address": "192.0.2.129"
        }
      ]
    }
  }
2.2.7. User Authentication
RBFS supports user authentication through a centralized TACACS+ server and with a local authentication system. The following authentication process typically occurs when a user attempts to access the network.
-
When a user logs in through
SSH, the SSH Daemon (sshd) invokes the Pluggable Authentication Module (PAM) to trigger authentication process. -
PAM requests TACACS+ authentication (except for the user with the
supervisorprivileges). -
TACACS+ server provides 'grant access' node if the user authentication is successful.
-
If the user is not allowed using the TACACS+ authentication, it is required to undergo an additional authentication phase. PAM looks up local users. Upon successful authentication, PAM generates RTB PAM token; includes user role in 'scope'.
2.2.7.1. Define Users on TACACS+ Server
Administrator needs to define users and associate them with the predefined roles on the TACACS+ server. Optionally, RBFS CLI commands can be restricted using the rtb-allow-cmds and rtb-deny-cmds.
The tac_plus.conf file contains configuration information for the tac_plus(tacacs+) daemon. This file is stored at the following location:
/etc/tacacs+/tac_plus.conf
To view the TACACS+ server configuration file, enter the following command.
sudo cat /etc/tacacs+/tac_plus.conf
For more information about TACACS+ server configuration, see
This Reference Design document uses the default local user supervisor for the configurations, whereas other users, defined in the TACACS server, can log into RBFS by using their usernames and passwords.
The following TACACS+ configuration shows the details of the TACACS users.
-
Click
 to download the
 tac_plus.conffile.
2.2.7.2. Configure TACACS+ on RBFS
After defining the users on the TACACS+ server, configure the TACACS+ server on C-BNG. This configuration allows the remote TACACS+ server to communicate with the C-BNG and to validate user access on the network.
The following steps provide the commands to configure TACACS+. For more information about TACACS+ configuration, see Configure TACACS+ on RBFS.
To access the TACACS+ service running in the ONL, this service has to be enabled in inband management. On configuring this, the hosts reachable in inband instance via the physical interface can access this service.
set system secure-management-status true
set system authorization tacacs 192.0.2.130 inband secret-plain-text RtBrick_Little_Secret
set inband-management instance inband_mgmt tacacs true
commit
In the above configuration, the command set inband-management instance inband_mgmt tacacs true is used to enable TACACS+ under the instance called inband_mgmt.
TACACS+ configuration is shown below:
supervisor@rtbrick>C-BNG.rtbrick.net: cfg> show config system authorization
{
  "rtbrick-config:authorization": {
    "tacacs": [
      {
        "ipv4-address": "192.0.2.130",
        "type": "inband",
        "secret-encrypted-text": "$22464b2c7336cfe71e596c447be28d598b9b7b37f92faea157fd5058e5fe0d769"
      }
    ]
  }
}
Configuration for enabling TACACS+ under the instance inband_mgmt is shown below:
"rtbrick-config:inband-management": {
      "instance": [
        {
          "name": "inband_mgmt",
          "tacacs": "true"
        }
      ]
    },
Enabling TACACS+ Service on the Service Node
Enter the following commands to enable the TACACS service on the Service Node.
~$ sudo /bin/systemctl enable tacacs_plus.service
~$ sudo /bin/systemctl start tacacs_plus.service
Validating TACACS+ authentication
The following scenario shows a successful authentication for the user bob with password bob.
~$ ssh bob@C-BNG.rtbrick.net
bob@C-BNG.rtbrick.net's password:
Last login: Mon Apr 3 16:13:40 2023 from C-BNG.rtbrick.net
bob@rtbrick>C-BNG.rtbrick.net: op>
The following scenario shows an unsuccessful password authentication for the user bob with password bob123.
~$ ssh bob@rtbrick>C-BNG.rtbrick.net:
bob@C-BNG.rtbrick.net's password:
Permission denied, please try again.
bob@C-BNG.rtbrick.net's password:
The following scenario shows an unsuccessful authentication for an undefined user frank.
~$ ssh frank@rtbrick>C-BNG.rtbrick.net:
frank@C-BNG.rtbrick.net's password:
Permission denied, please try again.
frank@C-BNG.rtbrick.net's password:
accounting file = /var/log/tac_plus.acct
key = RtBrick_Little_Secret
2.2.7.3. Configure User Management
Configuring Local User Management enables administrators to create, manage, and secure the users and groups. It allows creation of privileges that are configurable for user-defined and predefined roles.
The following steps provide the commands to configure user management. For more information about license configuration, see Local User Management.
-
To create a role, configure the RBAC privilege and the command privilege. To configure the RBAC privilege for both table and object:
set system user admin role supervisor
set system user admin shell /bin/bash
set system user admin password-hashed-text $6$XNkmuMRI.5.R/NBJ$XDfZec7gEM3z/3lYn8mDDWimRZ/68xawia.pTMdrGqoYHEE3nWHB08DeaPNQTwHW6WjB1aX6.xjYjh8CNCy4g1
commit
For information about Configuring hashed password, see Configure Hashed Password.
Authentication configuration of a password hashed text and an SSH public key is shown below:
{
  "ietf-restconf:data": {
    "rtbrick-config:system": {
      "user": [
        {
          "username": "admin",
          "shell": "/usr/local/bin/cli",
          "password-hashed-text": "$5$L2DaOYYuddhBV$9RA5MX9RQzLC9fIKJzbnoFBb88w9rkSXl7GVrVJ9PY7",
          "ssh-pub-key": [
            "ssh-rsa AAAAWsfg&jdkfs4D34H5@2evf....."
            ]
        }
      ]
    }
  }
}
2.2.8. Configure Syslog
RBFS supports sending log messages to a Syslog server. The Syslog configuration can be performed in RBFS.
To configure logging for bgp by using Syslog, enter the following commands.
set log module bgp
set log module bgp level debug
set log module bgp plugin-alias
set log module bgp plugin-alias alias-name syslog
set log module bgp plugin-alias level debug
commit
|
|
For event logging, CtrlD only supports Graylog and Syslog. Graylog must be disabled in order to enable Syslog. In addition, Graylog attributes must be replaced with Syslog attributes. |
Sylog configuration for the module bgp is shown below:
supervisor@rtbrick>C-BNG.rtbrick.net: cfg> show config log
{
  "rtbrick-config:log": {
    "module": [
      {
        "module-name": "bgp",
        "level": "debug",
        "plugin-alias": {
          "alias-name": "syslog",
          "level": "debug"
        }
      }
    ]
  }
}
2.2.8.1. Accessing the ONL to Configure Syslog
The steps described in this section are performed on the ONL (Open Network Linux). For logging into the ONL, use SSH port 1022.
ssh supervisor@<C-BNG-management-ip> -p 1022
After logging into the ONL, go to the following location of CtrlD and edit the config.json file.
-
/etc/rtbrick/ctrld/config.json
Specify the Syslog configurations as shown below in the config.json file.
{
    "rbms_enable": false,
    "graylog_enable": false,
    "syslog_enable": true,
    "syslog_network": "udp",
    "syslog_urls": [
      "198.51.100.49:516"
    ],
    "syslog_severity_level": 7,
    "auth_enabled": false
}
|
|
|
After making configuration changes in the config.json, restart CtrlD service as shown below.
supervisor@onl>C-BNG.rtbrick.net:~ $ sudo service rtbrick-ctrld restart
[sudo] password for supervisor:
[ ok ] Stopping rtbrick ctrld service:.
[ ok ] Starting rtbrick ctrld service:.
2.2.9. Monitor Resources (Resmon)
Resource monitoring enables administrators to collect and analyze the health information and usage data of various hardware resources such as CPU, memory, processes, disks, sensors, optics, and so on.
Run show cpu usage, show memory usage and show disk usage to see the CPU, memory and disk utilization respectively.
supervisor@rtbrick>C-BNG.rtbrick.net: cfg> show cpu usage
Name         Total       User     System       Nice   I/O Wait       Idle        IRQ   Soft IRQ
cpu            11%         9%         1%         0%         0%        88%         0%         0%
cpu0           10%         8%         1%         0%         0%        89%         0%         0%
cpu1           44%        43%         1%         0%         0%        55%         0%         0%
cpu2           34%        32%         2%         0%         0%        66%         0%         0%
cpu3           11%         9%         2%         0%         0%        89%         0%         0%
cpu4            3%         1%         2%         0%         0%        96%         0%         0%
cpu5            4%         3%         1%         0%         0%        96%         0%         0%
cpu6           13%        11%         2%         0%         0%        87%         0%         0%
cpu7           24%        22%         1%         0%         0%        75%         0%         0%
cpu8            4%         2%         2%         0%         0%        95%         0%         0%
cpu9            2%         1%         1%         0%         0%        97%         0%         0%
cpu10           6%         4%         2%         0%         0%        93%         0%         0%
cpu11           3%         2%         1%         0%         0%        96%         0%         0%
cpu12           8%         6%         2%         0%         0%        91%         0%         0%
cpu13           3%         3%         0%         0%         0%        96%         0%         0%
cpu14           6%         4%         2%         0%         0%        93%         0%         0%
cpu15           8%         5%         2%         0%         0%        91%         0%         0%
supervisor@rtbrick>C-BNG.rtbrick.net: cfg> show memory usage
Name     Total            Used             Free         Shared       Buffers      Cached
RAM      31.03 GiB        8.51 GiB         17.04 GiB    1.19 GiB     112.66 MiB   5.37 GiB
SWAP     0 bytes          0 bytes          0 bytes      n/a          n/a          n/a
supervisor@rtbrick>C-BNG.rtbrick.net: cfg> show disk usage
Filesystem               Type             Size         Used         Available    Mountpoint          Usage %
none                     tmpfs            492 KiB      0 bytes      492 KiB      /dev                0.0
tmpfs                    tmpfs            15.51 GiB    17.23 MiB    15.5 GiB     /run                0.11
tmpfs                    tmpfs            6 GiB        828.75 MiB   5.19 GiB     /shm                13.49
tmpfs                    tmpfs            15.51 GiB    182.96 MiB   15.33 GiB    /dev/shm            1.15
tmpfs                    tmpfs            5 MiB        0 bytes      5 MiB        /run/lock           0.0
devtmpfs                 devtmpfs         1 MiB        0 bytes      1 MiB        /dev/mem            0.0
/dev/sda10               ext4             15.62 GiB    50.61 MiB    14.76 GiB    /var/log            0.33
/dev/sda6                ext4             29.4 GiB     4.24 GiB     23.65 GiB    /platform           15.2
tmpfs                    tmpfs            3.1 GiB      0 bytes      3.1 GiB      /run/user/1000      0.0
tmpfs                    tmpfs            3.1 GiB      0 bytes      3.1 GiB      /run/user/1001      0.0
tmpfs                    tmpfs            15.51 GiB    0 bytes      15.51 GiB    /sys/fs/cgroup      0.0
/dev/sda11               ext4             43.79 GiB    51.89 MiB    41.49 GiB    /var/crash          0.12
tmpfs                    tmpfs            3.1 GiB      1.02 MiB     3.1 GiB      /var/run-ext/onl/r  0.03
/var/cache/rtbrick/imag  overlay          29.4 GiB     4.24 GiB     23.65 GiB    /                   15.2
The show command can also be used to view other resource details. For information about the resmon configuration and operational commands, see the RBFS Resource Monitoring Guide.
3. Protocol Configurations
This validated solution design topology uses IS-IS as the interior gateway protocol to distribute IP routing information among the routers in an Autonomous System (AS). The Label Distribution Protocol (LDP) is used to exchange label mapping information for MPLS traffic. And, iBGP is used for exchanging routing and reachability information within ASs.
One thus needs to configure the following protocols:
-
IS-IS : To ensure IP connectivity on the core network.
-
LDP : To establish MPLS LSP tunnels for MPLS data transmission on the network.
-
iBGP: To exchange routing information within an AS.
3.1. Configure IS-IS
The following steps provide the commands to execute various IS-IS protocol functionalities. For more detailed information about IS-IS configuration, see IS-IS User Guide
-
Configure IS-IS system-id, area, hostname and interfaces.
set instance default protocol isis system-id 1920.0000.2064
set instance default protocol isis area 49.0001/24
set instance default protocol isis hostname C-BNG
set instance default protocol isis interface ifl-0/1/31/10
set instance default protocol isis interface ifl-0/1/31/10 type point-to-point
set instance default protocol isis interface ifl-0/1/31/10 level-2 adjacency-disable true
set instance default protocol isis interface lo-0/0/1/0
set instance default protocol isis interface lo-0/0/1/0 passive true
commit
IS-IS instance configuration on interface is shown below:
supervisor@rtbrick>C-BNG.rtbrick.net: op> show config instance default protocol isis
{
  "rtbrick-config:isis": {
    "system-id": "1920.0000.2064",
    "area": [
      "49.0001/24"
      ],
    "hostname": "C-BNG",
    "interface": [
      {
        "name": "ifl-0/1/31/10",
        "type": "point-to-point",
        "level-2": {
          "adjacency-disable": "true"
        }
      },
      {
        "name": "lo-0/0/1/0",
        "passive": "true"
      }
    ]
  }
}
3.2. Configure LDP on the Interfaces
The following steps provide the commands to execute various LDP functionalities. For more detailed information about LDP configuration, see LDP User Guide.
-
Configure LDP on the router interface.
set instance default protocol ldp router-id 192.0.2.64
set instance default protocol ldp interface ifl-0/1/31/10
set instance default protocol ldp interface lo-0/0/1/0
commit
Configuration for LDP on the interface is shown below:
supervisor@rtbrick>C-BNG.rtbrick.net: cfg> show config instance default protocol ldp
{
  "rtbrick-config:ldp": {
    "router-id": "192.0.2.64",
    "interface": [
      {
        "name": "ifl-0/1/31/10"
      },
      {
        "name": "lo-0/0/1/0"
      }
    ]
  }
}
3.3. Configure BGP
The following steps provide the commands to execute the various BGP functionalities quickly. For more detailed information about BGP configuration, see BGP User Guide.
-
Configure BGP local AS, router-id, and hostname
set instance default protocol bgp local-as 4200000001
set instance default protocol bgp router-id 192.0.2.64
set instance default protocol bgp hostname C-BNG
commit
BGP local AS, router-id, and hostname configurations are shown below:
supervisor@rtbrick>C-BNG.rtbrick.net: cfg> show config instance default protocol bgp
{
  "rtbrick-config:bgp": {
    "local-as": 4200000001,
    "hostname": "C-BNG",
    "router-id": "192.0.2.64",

<....>
-
Enable the IPv4 and IPv6 address families which are to be supported on the specific BGP instance.
set instance default protocol bgp address-family ipv4 unicast
set instance default protocol bgp address-family ipv4 unicast resolve-nexthop safi labeled-unicast
set instance default protocol bgp address-family ipv6 labeled-unicast
set instance default protocol bgp address-family ipv6 unicast
set instance default protocol bgp address-family ipv6 unicast resolve-nexthop safi labeled-unicast
commit
BGP address family configuration is shown below:
supervisor@rtbrick>C-BNG.rtbrick.net: cfg> show config instance default protocol bgp address-family
{
  "rtbrick-config:address-family": [
    {
      "afi": "ipv4",
      "safi": "unicast",
      "resolve-nexthop": {
        "safi": "labeled-unicast"
      }
    },
    {
      "afi": "ipv6",
      "safi": "labeled-unicast"
    },
    {
      "afi": "ipv6",
      "safi": "unicast",
      "resolve-nexthop": {
        "safi": "labeled-unicast"
      }
    }
  ]
}
-
Create the peer group with the specific remote AS configurations and the address family that is to be negotiated with the peer which will be attached to the peer group later.
set instance default protocol bgp peer-group RR
set instance default protocol bgp peer-group RR remote-as 4200000001
set instance default protocol bgp peer-group RR address-family ipv4 unicast
set instance default protocol bgp peer-group RR address-family ipv6 labeled-unicast
set instance default protocol bgp peer-group RR address-family ipv6 unicast
commit
BGP peer-group configuration is shown below:
supervisor@rtbrick>C-BNG.rtbrick.net: cfg> show config instance default protocol bgp peer-group
{
  "rtbrick-config:peer-group": [
    {
      "pg-name": "RR",
      "remote-as": 4200000001,
      "address-family": [
        {
          "afi": "ipv4",
          "safi": "unicast"
        },
        {
          "afi": "ipv6",
          "safi": "labeled-unicast"
        },
        {
          "afi": "ipv6",
          "safi": "unicast"        }
      ]
    }
  ]
}
supervisor@rtbrick>C-BNG.rtbrick.net: cfg>
-
Add a BGP peer and associate it with the specific peer group.
set instance default protocol bgp peer
set instance default protocol bgp peer ipv4 198.51.100.3 192.0.2.64
set instance default protocol bgp peer ipv4 198.51.100.3 192.0.2.64 peer-group RR
commit
Configuration for adding a BGP peer and associating it with a peer group is shown below:
supervisor@rtbrick>C-BNG.rtbrick.net: cfg> show config instance default protocol bgp peer
{
  "rtbrick-config:peer": {
    "ipv4": [
      {
        "peer-address": "198.51.100.3",
        "update-source": "192.0.2.64",
        "peer-group": "RR"
      }
    ]
  }
}
supervisor@rtbrick>C-BNG.rtbrick.net: cfg>
-
Configure the IPv6 unicast address family with
send-labelas true, then address-family IPv6 labeled-unicast gets negotiated with the peer.
set instance default protocol bgp peer-group RR address-family ipv6 unicast send-label true
commit
The following configuration shows the BGP IPv6 unicast address family with send-label as true.
supervisor@rtbrick>C-BNG.rtbrick.net: cfg> show config instance default protocol bgp peer-group RR address-family ipv6 unicast
{
  "rtbrick-config:address-family": [
    {
      "afi": "ipv6",
      "safi": "unicast",
      "send-label": "true"
    }
  ]
}
supervisor@rtbrick>C-BNG.rtbrick.net: cfg>
-
Set the resolve-nexthop, if the BGP nexthop attribute of the BGP routes needs to be resolved under ipv4/ipv6 labeled-unicast routing table. It configures only resolve-nexthop safi. Based on the nexthop-type (ipv4 or ipv6), it gets looked up into either IPv4 labeled-unicast or IPv6 labeled-unicast.
set instance default protocol bgp address-family ipv4 unicast resolve-nexthop safi labeled-unicast
commit
Resolve nexthop configuration is shown below:
supervisor@rtbrick>C-BNG.rtbrick.net: cfg> show config instance default protocol bgp address-family ipv4 unicast resolve-nexthop
{
  "rtbrick-config:resolve-nexthop": {
    "safi": "labeled-unicast"
  }
}
supervisor@rtbrick>C-BNG.rtbrick.net: cfg>
-
To redistribute the routes (belonging to a specific source) into BGP, execute the following command. The following command redistributes
directroutes into BGP.
set instance default protocol bgp address-family ipv4 unicast redistribute direct
commit
supervisor@rtbrick>C-BNG.rtbrick.net: cfg> show config instance default protocol bgp address-family ipv4 unicast redistribute
{
  "rtbrick-config:redistribute": [
    {
      "source": "direct"
    }
  ]
}
supervisor@rtbrick>C-BNG.rtbrick.net: cfg>
3.4. Configuring the Service Node
3.4.1. Configuring Interfaces on the Service Node for RADIUS Connectivity from C-BNG
To configure interfaces on the Service Node for RADIUS connectivity from C-BNG, enter the following commands:
sudo ip link add link SN1-3-C1 name SN1-3-C1.100 type vlan id 100
sudo ifconfig SN1-3-C1.100 192.0.2.34/27
|
|
SN1-3-C1 is the internal nomenclature that denotes the interface name on Service Node that connects to the C-BNG.
|
3.4.2. Configuring Interfaces on the Service Node for NTP and TACACS Connectivity from C-BNG
To configure interfaces on the Service Node for NTP and TACACS connectivity from C-BNG, enter the following commands:
sudo ip link add link SN1-3-C1 name SN1-3-C1.200 type vlan id 200
sudo ifconfig SN1-3-C1.200 192.0.2.98/27
sudo ifconfig lo:1 192.0.2.129 netmask 255.255.255.255 up
sudo ifconfig lo:2 192.0.2.130 netmask 255.255.255.255 up
3.4.3. Configuring Routes on the Service Node
To configure routes on the Service Node that provides reachability to the RADIUS, TACACS and NTP servers, enter the following commands:
sudo ip route add 192.0.2.74/32 via 192.0.2.33
sudo ip route add 192.0.2.131/32 via 192.0.2.97
sudo ip route add 192.0.2.128/32 via 192.0.2.97
3.4.4. BNG Blaster Configuration for Protocols
BNG Blaster is an open-source network testing platform for access and routing protocols. It can emulate massive PPPoE and IPoE (DHCP) subscribers including IPTV, and L2TP (LNS). There are various routing protocols supported such as IS-IS and BGP. So, one can use this platform for end-to-end BNG and non-BNG router testing.
For more information about BNG Blaster, see https://github.com/rtbrick/bngblaster
For information about installing BNG Blaster, see https://rtbrick.github.io/bngblaster/install.html
3.4.4.1. Downloading the Blaster Configuration File
The following is the configuration file that is used in BNG Blaster for validating IPoE, BGP, IS-IS, and LDP.
-
Click
to download the BNG Blaster configuration file (blaster.json).
3.4.4.2. Generating Supporting Files for Protocols
-
Generating BGP Internet Prefixes
Enter the following commands to generate BGP internet prefixes.
bgpupdate -f internet.bgp -a 4200000001 -n 198.51.100.2 -N 1 -p 172.16.0.0/24 -P 1000000
bgpupdate -f internet.bgp -a 4200000001 -n 198.51.100.2 -N 1 -p 2004::/48 -m 10000 -M 5 -P 150000 --append
Ensure that the command execution has finished (as shown below) before continuing.
[2023-04-05 10:19:32][INFO   ] init 1000000 IPv4 prefixes
[2023-04-05 10:19:56][INFO   ] open file internet.bgp (replace)
[2023-04-05 10:25:31][INFO   ] finished
After the generation of the internet.bgp file, the "raw-update-file" attribute of the blaster.json file needs to be updated as follows:
"raw-update-file": "/home/supervisor/internet.bgp"
|
|
For more information about downloading the blaster.json file, see section section 3.4.4.1, “Downloading the Blaster Configuration File”. |
-
Generating MRT FIle for IS-IS
Below is the JSON file (isis_3node.json) which is used to simulate R-1, R-2, and RR on BNG Blaster.
-
Click
to download the` isis_3node.json` file.
This JSON file needs to converted to MRT format using the following command:
lspgen -r isis_3node.json -m isis.mrt
After converting the file to isis.mrt, it needs to be updated in the IS-IS section in the blaster.json file as shown below.
"mrt-file": "/home/supervisor/isis.mrt"
-
Generate labels for the IS-IS prefixes using "ldpupdate" command as shown below:
ldpupdate -l 192.0.2.65 -p 198.51.100.1/32 -P 3 -M 3 -f out.ldp
The detail of the generated file needs to be added to the LDP section in the blaster.json file as shown below:
"raw-update-file": "/home/supervisor/out.ldp"
3.4.4.3. Starting BNG Blaster
In the following command line string, a BNG Blaster instance is started and the blaster.json file is used.
sudo bngblaster -C blaster.json -I
The -C blaster.json argument specifies the blaster configuration file. The -I flag enables the interactive blaster UI.
3.5. Validating Protocols on RBFS Consolidated BNG
3.5.1. Validating IS-IS Adjacency, Routes and Reachability
Run the following command to show IS-IS adjacency.
supervisor@rtbrick>C-BNG.rtbrick.net: op> show isis neighbor
Instance: default
  Interface          System             Level   State   Type    Up since                Expires
  ifl-0/1/31/10       BNG-Blaster        L1      Up      P2P     Wed Mar 29 05:23:24     in 22s 242106us
After configuring IS-IS protocol, check the IPv4 unicast routes, populated by IS-IS using the following command:
supervisor@rtbrick>C-BNG.rtbrick.net: op> show route ipv4 unicast source isis instance default
Instance: default, AFI: ipv4, SAFI: unicast
Prefix/Label                             Source            Pref    Next Hop                                 Interface

192.0.2.2/27                             isis              15      192.0.2.2                                ifl-0/1/31/10
192.0.2.65/32                            isis              15      192.0.2.2                                ifl-0/1/31/10
198.51.100.1/32                          isis              15      192.0.2.2                                ifl-0/1/31/10
198.51.100.2/32                          isis              15      192.0.2.2                                ifl-0/1/31/10
198.51.100.3/32                          isis              15      192.0.2.2                                ifl-0/1/31/10
198.51.100.101/31                        isis              15      192.0.2.2                                ifl-0/1/31/10
198.51.100.103/31                        isis              15      192.0.2.2                                ifl-0/1/31/10
198.51.100.105/31                        isis              15      192.0.2.2                                ifl-0/1/31/10
Ping the address 192.0.2.65 as follows:
supervisor@rtbrick>C-BNG.rtbrick.net: op> ping 192.0.2.65
68 bytes from 192.0.2.65: icmp_seq=1 ttl=64 time=9.0436 ms
68 bytes from 192.0.2.65: icmp_seq=2 ttl=64 time=2.0959 ms
68 bytes from 192.0.2.65: icmp_seq=3 ttl=64 time=4.7229 ms
68 bytes from 192.0.2.65: icmp_seq=4 ttl=64 time=9.2496 ms
68 bytes from 192.0.2.65: icmp_seq=5 ttl=64 time=2.6149 ms
Statistics: 5 sent, 5 received, 0% packet loss
3.5.2. Validating LDP Adjacency, Routes and Reachability
Run the following commands to show LDP neighbor and LDP session.
supervisor@rtbrick>C-BNG.rtbrick.net: op> show ldp neighbor
Instance: default
  Interface           LDP ID              Transport IP  Up Since                  Expires
  ifl-0/1/31/10        192.0.2.65:0        192.0.2.65    Wed Mar 29 05:21:11       in 11s
supervisor@rtbrick>C-BNG.rtbrick.net: op> show ldp session
Instance: default
  LDP ID            Peer IP           State             Up/Down           FECRcvd   FECSent
  192.0.2.65:0      192.0.2.65        Operational       0d:03h:55m:49s          5         5
After configuring the LDP protocol, check the IPv4 labeled unicast routes, populated by LDP using the following command:
supervisor@rtbrick>C-BNG.rtbrick.net: op>  show route ipv4 labeled-unicast source ldp
Instance: default, AFI: ipv4, SAFI: labeled-unicast
Prefix/Label                             Source            Pref    Next Hop                                 Interface                      Label
192.0.2.2/27                             ldp               9       192.0.2.2                                ifl-0/1/31/10                  -
192.0.2.65/32                            ldp               9       192.0.2.2                                ifl-0/1/31/10                  -
198.51.100.1/32                          ldp               9       192.0.2.2                                ifl-0/1/31/10                  10000
198.51.100.2/32                          ldp               9       192.0.2.2                                ifl-0/1/31/10                  10001
198.51.100.3/32                          ldp               9       192.0.2.2                                ifl-0/1/31/10                  10002
Ping the labeled unicast address 198.51.100.1 as follows:
supervisor@rtbrick>C-BNG.rtbrick.net: op> ping 198.51.100.1 instance default afi ipv4 safi labeled-unicast
68 bytes from 198.51.100.1: icmp_seq=1 ttl=64 time=6.3289 ms
68 bytes from 198.51.100.1: icmp_seq=2 ttl=64 time=2.8249 ms
68 bytes from 198.51.100.1: icmp_seq=3 ttl=64 time=1.8587 ms
68 bytes from 198.51.100.1: icmp_seq=4 ttl=64 time=5.9599 ms
68 bytes from 198.51.100.1: icmp_seq=5 ttl=64 time=4.3811 ms
Statistics: 5 sent, 5 received, 0% packet loss
|
|
The command argument labeled-unicast takes the ICMP requests through a labeled path while validating IP connectivity and hence, it prepends an MPLS label.
|
3.5.3. Validating BGP Adjacency, Routes and Reachability
Run the following commands to show BGP session and state.
supervisor@rtbrick>C-BNG.rtbrick.net: op> show bgp peer
Instance: default
  Peer                                     Remote AS    State         Up/Down Time               PfxRcvd              PfxSent
  198.51.100.3                             4200000001   Established   0d:00h:01m:24s             1150000              5
After configuring BGP, check the IPv4 unicast routes, populated by BGP using the following command:
supervisor@rtbrick>C-BNG.rtbrick.net: op> show route ipv4 unicast source bgp instance default
Instance: default, AFI: ipv4, SAFI: unicast
Prefix/Label                             Source            Pref    Next Hop                                 Interface
172.16.0.0/24                            bgp               200     198.51.100.2                             ifl-0/1/31/10
172.16.1.0/24                            bgp               200     198.51.100.2                             ifl-0/1/31/10
172.16.2.0/24                            bgp               200     198.51.100.2                             ifl-0/1/31/10
172.16.3.0/24                            bgp               200     198.51.100.2                             ifl-0/1/31/10
172.16.4.0/24                            bgp               200     198.51.100.2                             ifl-0/1/31/10
172.16.5.0/24                            bgp               200     198.51.100.2                             ifl-0/1/31/10
172.16.6.0/24                            bgp               200     198.51.100.2                             ifl-0/1/31/10
172.16.7.0/24                            bgp               200     198.51.100.2                             ifl-0/1/31/10
172.16.8.0/24                            bgp               200     198.51.100.2                             ifl-0/1/31/10
172.16.9.0/24                            bgp               200     198.51.100.2                             ifl-0/1/31/10

<...>
This command will list all the 1 million IPv4 BGP internet prefixes.
Pinging an IPv4 route (source: bgp) from the C-BNG.
supervisor@rtbrick>C-BNG.rtbrick.net: op> ping 172.16.1.0
68 bytes from 172.16.1.0: icmp_seq=1 ttl=64 time=6.0527 ms
68 bytes from 172.16.1.0: icmp_seq=2 ttl=64 time=6.2893 ms
68 bytes from 172.16.1.0: icmp_seq=3 ttl=64 time=2.5573 ms
68 bytes from 172.16.1.0: icmp_seq=4 ttl=64 time=4.6964 ms
68 bytes from 172.16.1.0: icmp_seq=5 ttl=64 time=5.6455 ms
Statistics: 5 sent, 5 received, 0% packet loss
Check the IPv6 unicast routes, populated by BGP using the following command:
supervisor@rtbrick>C-BNG.rtbrick.net: op> show route ipv6 unicast source bgp instance default
Instance: default, AFI: ipv6, SAFI: unicast
Prefix/Label                             Source            Pref    Next Hop                                 Interface
2004::/48                                bgp               200     198.51.100.2                             ifl-0/1/31/10
2004:0:1::/48                            bgp               200     198.51.100.2                             ifl-0/1/31/10
2004:0:2::/48                            bgp               200     198.51.100.2                             ifl-0/1/31/10
2004:0:3::/48                            bgp               200     198.51.100.2                             ifl-0/1/31/10
2004:0:4::/48                            bgp               200     198.51.100.2                             ifl-0/1/31/10
2004:0:5::/48                            bgp               200     198.51.100.2                             ifl-0/1/31/10
2004:0:6::/48                            bgp               200     198.51.100.2                             ifl-0/1/31/10
2004:0:7::/48                            bgp               200     198.51.100.2                             ifl-0/1/31/10
2004:0:8::/48                            bgp               200     198.51.100.2                             ifl-0/1/31/10
2004:0:9::/48                            bgp               200     198.51.100.2                             ifl-0/1/31/10
2004:0:a::/48                            bgp               200     198.51.100.2                             ifl-0/1/31/10
2004:0:b::/48                            bgp               200     198.51.100.2                             ifl-0/1/31/10
2004:0:c::/48                            bgp               200     198.51.100.2                             ifl-0/1/31/10
2004:0:d::/48                            bgp               200     198.51.100.2                             ifl-0/1/31/10
2004:0:e::/48                            bgp               200     198.51.100.2                             ifl-0/1/31/10
2004:0:f::/48                            bgp               200     198.51.100.2                             ifl-0/1/31/10

<...>
Pinging an IPv6 route (source: bgp) from the C-BNG.
supervisor@rtbrick>C-BNG.rtbrick.net: op> ping 2004:0:1::
68 bytes from 2004:0:1::: icmp_seq=1 ttl=253 time=10.0398 ms
68 bytes from 2004:0:1::: icmp_seq=2 ttl=253 time=2.9673 ms
68 bytes from 2004:0:1::: icmp_seq=3 ttl=253 time=6.2365 ms
68 bytes from 2004:0:1::: icmp_seq=4 ttl=253 time=7.9022 ms
68 bytes from 2004:0:1::: icmp_seq=5 ttl=253 time=1.5511 ms
Statistics: 5 sent, 5 received, 0% packet loss
4. IPoE Subscriber Management Configuration
IP-over-Ethernet (IPoE) is an access technology that uses DHCP for IPv4 and DHCPv6 for IPv6 where both protocols are handled in the IPoE daemon (ipoed). IPoE subscribers are identified by IFP, VLANs and client MAC addresses.
The dynamic creation of IPoE subscribers is triggered by DHCPv4 discover or DHCPv6 solicit request from the subscriber. Response is postponed until the subscriber is successfully authenticated using the known authentication methods such as local or RADIUS, however authentication is not mandatory. After the authentication phase, IPv4/IPv6/IPv6-PD address is allocated to the subscriber either from the local pool or from RADIUS.
For IPoE Subscriber Management, the following configurations are mandatory:
-
Access Interface Configuration
-
Access Profile Configuration
-
AAA (Authentication, Authorization and Accounting) Profile Configuration. Based on the authentication requirement, configure any one of the following:
-
Local Authentication
-
Pool Configuration
-
User Profile Configuration
-
-
RADIUS Authentication
-
RADIUS Profile Configuration
-
RADIUS Server Configuration
-
-
This solution section discusses RADIUS authentication.
NOTES:
-
Access interfaces can be configured without VLAN tags (untagged) and with one (single tagged) or two (double tagged) VLAN tags.
-
There can be more than one interface configured for subscriber management and each interface can reference the same profile.
4.1. Configuring IPoE Subscriber Management
For detailed information about the subscriber configuration options, see the Subscriber Management Configuration Guide.
-
Configure the access profile
ipoe.
set access access-profile ipoe
set access access-profile ipoe protocol dhcp enable true
set access access-profile ipoe protocol dhcp lease-time 60
set access access-profile ipoe protocol dhcpv6 enable true
set access access-profile ipoe protocol dhcpv6 lifetime 60
set access access-profile ipoe address-family ipv4 enable true
set access access-profile ipoe address-family ipv4 pool-name poolv4
set access access-profile ipoe address-family ipv4 instance default
set access access-profile ipoe address-family ipv4 dad-enable true
set access access-profile ipoe address-family ipv6 enable true
set access access-profile ipoe address-family ipv6 pool-name poolv6
set access access-profile ipoe address-family ipv6 prefix-delegation-pool-name poolv6pd
set access access-profile ipoe address-family ipv6 instance default
set access access-profile ipoe address-family ipv6 dad-enable true
commit
The access profile configuration is shown below.
supervisor@rtbrick>C-BNG.rtbrick.net: op> show config access access-profile
{
  "rtbrick-config:access-profile": [
    {
      "profile-name": "ipoe",
      "protocol": {
        "dhcp": {
          "enable": "true",
          "lease-time": 60
        },
        "dhcpv6": {
          "enable": "true",
          "lifetime": 60
        }
      },
      "address-family": {
        "ipv4": {
          "enable": "true",
          "pool-name": "poolv4",
          "instance": "default",
          "dad-enable": "true"
        },
        "ipv6": {
          "enable": "true",
          "pool-name": "poolv6",
          "prefix-delegation-pool-name": "poolv6pd",
          "instance": "default",
          "dad-enable": "true"
        }
      }
    }
  ]
}
supervisor@rtbrick>C-BNG.rtbrick.net: op>
-
Configure the Authentication and Accounting (AAA) profile for
aaa-profile.
set access aaa-profile aaa-profile
set access aaa-profile aaa-profile session-timeout 0
set access aaa-profile aaa-profile idle-timeout 0
set access aaa-profile aaa-profile aaa-radius-profile radius-profile
set access aaa-profile aaa-profile authentication order RADIUS
set access aaa-profile aaa-profile accounting order RADIUS
set access aaa-profile aaa-profile accounting interim-interval 86400
set access aaa-profile aaa-profile accounting ingress accounting-source POLICER
set access aaa-profile aaa-profile accounting egress accounting-source CLASS
commit
The access AAA configuration is shown below.
supervisor@rtbrick>C-BNG.rtbrick.net: op> show config access aaa-profile
{
  "rtbrick-config:aaa-profile": [
    {
      "profile-name": "aaa-profile",
      "session-timeout": 0,
      "idle-timeout": 0,
      "aaa-radius-profile": "radius-profile",
      "authentication": {
        "order": "RADIUS"
      },
      "accounting": {
        "order": "RADIUS",
        "interim-interval": 86400,
        "ingress": {
          "accounting-source": "POLICER"        },
        "egress": {
          "accounting-source": "CLASS"
        }
      }
    }
  ]
}
supervisor@rtbrick>C-BNG.rtbrick.net: op>
-
Configure the access interface. Double-tagged interface is configured in this case as the access interface (
ifp-0/1/30). The interface configuration assigns the access type, access profile, AAA profile, and further optional attributes like service-profile to the specified access interface.
set access interface double-tagged ifp-0/1/30 1001 1100 1001 1100
set access interface double-tagged ifp-0/1/30 1001 1100 1001 1100 access-type IPoE
set access interface double-tagged ifp-0/1/30 1001 1100 1001 1100 access-profile-name ipoe
set access interface double-tagged ifp-0/1/30 1001 1100 1001 1100 service-profile-name qos_service
set access interface double-tagged ifp-0/1/30 1001 1100 1001 1100 aaa-profile-name aaa-profile
set access interface double-tagged ifp-0/1/30 1001 1100 1001 1100 gateway-ifl lo-0/0/1/0
commit
The double-tagged access interface configuration is shown below.
supervisor@rtbrick>C-BNG.rtbrick.net: op> show config access interface
{
  "rtbrick-config:interface": {
    "double-tagged": [
      {
        "interface-name": "ifp-0/1/30",
        "outer-vlan-min": 1001,
        "outer-vlan-max": 1100,
        "inner-vlan-min": 1001,
        "inner-vlan-max": 1100,
        "access-type": "IPoE",
        "access-profile-name": "ipoe",
        "service-profile-name": "qos_service",
        "aaa-profile-name": "aaa-profile",
        "gateway-ifl": "lo-0/0/1/0"
      }
    ]
  }
}
-
In this solution, we configure AAA authentication and accounting with RADIUS. To use RADIUS authentication and accounting both the RADIUS profile and RADIUS server configurations (see below) must be configured.
-
Configure RADIUS profile
radius-profile.
set access radius-profile radius-profile
set access radius-profile radius-profile nas-ip-address 192.0.2.74
set access radius-profile radius-profile nas-port-format DEFAULT
set access radius-profile radius-profile nas-port-type Ethernet
set access radius-profile radius-profile authentication radius-server-profile-name radius
set access radius-profile radius-profile accounting radius-server-profile-name radius
commit
The RADIUS profile configuration is shown below.
supervisor@rtbrick>C-BNG.rtbrick.net: op> show config access radius-profile radius-profile
{
  "rtbrick-config:radius-profile": [
    {
      "profile-name": "radius-profile",
      "nas-ip-address": "192.0.2.74",
      "nas-port-format": "DEFAULT",
      "nas-port-type": "Ethernet",
      "authentication": {
        "radius-server-profile-name": [
          "radius"
          ]
      },
      "accounting": {
        "radius-server-profile-name": [
          "radius"
          ]
      }
    }
  ]
}
supervisor@rtbrick>C-BNG.rtbrick.net: op>
-
Configure the RADIUS server
radius.
set access radius-server radius
set access radius-server radius address 192.0.2.34
set access radius-server radius source-address 192.0.2.74
set access radius-server radius secret-plain-text testing123
set access radius-server radius routing-instance default
set access radius-server radius rate 300
set access radius-server radius authentication enable true
set access radius-server radius authentication retry 3
set access radius-server radius authentication timeout 5
set access radius-server radius accounting enable true
set access radius-server radius accounting timeout 30
set access radius-server radius coa enable true
commit
|
|
The attribute` secret-plain-text` will be converted to secret-encrypted-text in the show command output and value will be hashed.
|
The RADIUS server configuration is shown below.
supervisor@rtbrick>C-BNG.rtbrick.net: cfg> show config access radius-server radius
{
  "rtbrick-config:radius-server": [
    {
      "server-name": "radius",
      "address": "192.0.2.34",
      "source-address": "192.0.2.74",
      "secret-encrypted-text": "$2b2feb12f730107454b1be6a0f8242b0f",
      "routing-instance": "default",
      "rate": 300,
      "authentication": {
        "enable": "true",
        "retry": 3,
        "timeout": 5
      },
      "accounting": {
        "enable": "true",
        "timeout": 30
      },
      "coa": {
        "enable": "true"
      }
    }
  ]
}
supervisor@rtbrick>C-BNG.rtbrick.net: cfg>
-
Configure the IPv4 and IPv6 access pools.
set access pool poolv4
set access pool poolv4 ipv4-address low 203.0.113.1
set access pool poolv4 ipv4-address high 203.0.113.64
set access pool poolv6
set access pool poolv6 ipv6-prefix low 2001:db8:0:1::/64
set access pool poolv6 ipv6-prefix high 2001:db8:0:40::/64
set access pool poolv6pd
set access pool poolv6pd ipv6-prefix low 2001:db8:0:100::/56
set access pool poolv6pd ipv6-prefix high 2001:db8:0:4000::/56
commit
The access pool configuration is shown below.
supervisor@rtbrick>C-BNG.rtbrick.net: cfg> show config access pool
{
  "rtbrick-config:pool": [
    {
      "pool-name": "poolv4",
      "ipv4-address": {
        "low": "203.0.113.1",
        "high": "203.0.113.64"
      }
    },
    {
      "pool-name": "poolv6",
      "ipv6-prefix": {
        "low": "2001:db8:0:1::/64",
        "high": "2001:db8:0:40::/64"
      }
    },
    {
      "pool-name": "poolv6pd",
      "ipv6-prefix": {
        "low": "2001:db8:0:100::/56",
        "high": "2001:db8:0:4000::/56"
      }
    }
  ]
}
4.2. IPoE Quality of Service (QoS) Configuration
|
|
The QoS model explained in this document uses a complex HQoS model with the intent to showcase the complete range of QoS features available in RBFS. However, it may not be needed or desirable for all deployments. In such a case it should be possible to conceive of a simple QoS model as required by simplifying the provided QoS model. |
Following are the steps involved in configuring and verifying IPoE QoS:
-
Configuring service profile to enable QoS on IPoE subscriber
-
Configuring downstream QoS
-
Configuring upstream QoS
-
Configuring QoS remarking
-
Configuring IPoE subscriber accounting for upstream and downstream traffic
-
Configuring IPoE subscribers QoS on BNG Blaster
-
Validating IPoE QoS on BNG Blaster
The figure below shows how QoS is configured for ingress and egress traffic.
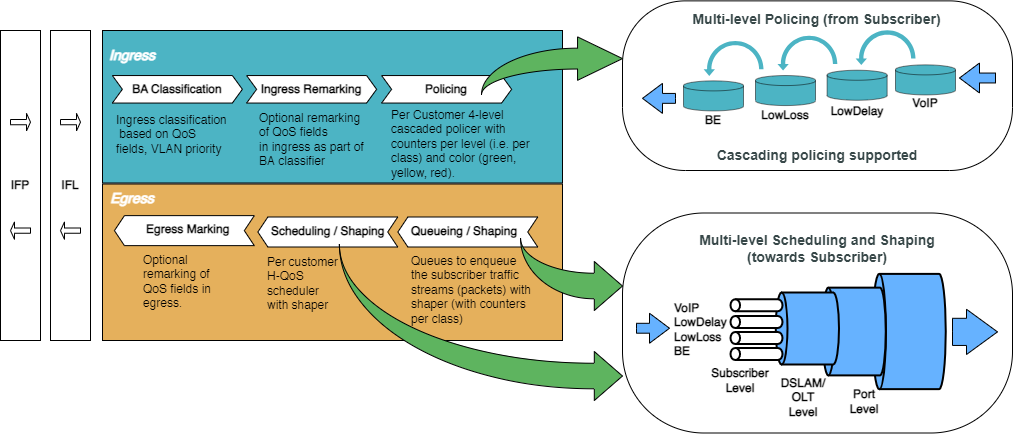
Fig. 2: Hierarchical Quality of Service primitives
For detailed information about the QoS configuration options, see the HQoS Configuration Guide.
4.2.1. Configure Service Profile
Service profile configuration in subscriber management allows to assign QoS configurations to a subscriber.
-
Configure the service profile to enable QoS. The service profile defined to enable Quality of Service with profile name is
residential.
set access service-profile qos_service qos profile residential
commit
The configuration of the service profile named residential is shown below.
supervisor@rtbrick>C-BNG.rtbrick.net: cfg> show config access service-profile qos_service
{
  "rtbrick-config:service-profile": [
    {
      "profile-name": "qos_service",
      "qos": {
        "profile": "residential"
      }
    }
  ]
}
-
Enable QoS on IPoE subscriber access interface (
ifp-0/1/30) to enable QoS for IPoE subscriber.
set access interface double-tagged ifp-0/1/30 1001 1100 1001 1100 service-profile-name qos_service
commit
Below is the double-tagged access interface on which the service profile qos_service is configured.
supervisor@rtbrick>C-BNG.rtbrick.net: cfg> show config access interface double-tagged ifp-0/1/30

{
  "rtbrick-config:double-tagged": [
    {
      "interface-name": "ifp-0/1/30",
      "outer-vlan-min": 1001,
      "outer-vlan-max": 1100,
      "inner-vlan-min": 1001,
      "inner-vlan-max": 1100,
      "access-type": "IPoE",
      "access-profile-name": "ipoe",
      "service-profile-name": "qos_service",
      "aaa-profile-name": "aaa-profile",
      "gateway-ifl": "lo-0/0/1/0"
    }
  ]
}
-
Configure QoS profile to enable on IPoE subscriber.
set forwarding-options class-of-service profile residential
set forwarding-options class-of-service profile residential classifier-name subs-pbit-class
set forwarding-options class-of-service profile residential class-queue-map-name subs-4queues
set forwarding-options class-of-service profile residential remark-map-name subs-remarking-residential
set forwarding-options class-of-service profile residential policer-name policer-residential
set forwarding-options class-of-service profile residential class-policer-map-name policer-map-residential
set forwarding-options class-of-service profile residential scheduler-map-name subs-4queues-residential
commit
The QoS Profile with all the primitives needed to enable traffic profiles on IPoE Subscribers is as follows:
supervisor@rtbrick>C-BNG.rtbrick.net: cfg> show config forwarding-options class-of-service profile residential
{
  "rtbrick-config:profile": [
    {
      "profile-name": "residential",
      "classifier-name": "subs-pbit-class",
      "class-queue-map-name": "subs-4queues",
      "remark-map-name": "subs-remarking-residential",
      "policer-name": "policer-residential",
      "class-policer-map-name": "policer-map-residential",
      "scheduler-map-name": "subs-4queues-residential"
    }
  ]
}
4.2.2. Configure Downstream QoS
Downstream Quality of Service (QoS) is used to prioritize network traffic from the Internet to subscribers.
-
Enable global classification for downstream traffic.
set forwarding-options class-of-service global multifield-classifier-name global_mfc
commit
Below is the multi-field-classifier (MFC) based classifier for global enabling of downstream traffic classification.
supervisor@rtbrick>C-BNG.rtbrick.net: cfg> show config forwarding-options class-of-service global multifield-classifier-name
{
  "rtbrick-config:multifield-classifier-name": "global_mfc"
}
-
Configure the MFC-based classifier with qualifiers and actions.
set forwarding-options class-of-service multifield-classifier acl l3v4 rule global_mfc
set forwarding-options class-of-service multifield-classifier acl l3v4 rule global_mfc ordinal 1001
set forwarding-options class-of-service multifield-classifier acl l3v4 rule global_mfc ordinal 1001 match ipv4-tos 128
set forwarding-options class-of-service multifield-classifier acl l3v4 rule global_mfc ordinal 1001 match source-ipv4-prefix 132.1.1.3/32
set forwarding-options class-of-service multifield-classifier acl l3v4 rule global_mfc ordinal 1001 action forward-class class-0
set forwarding-options class-of-service multifield-classifier acl l3v4 rule global_mfc ordinal 1002
set forwarding-options class-of-service multifield-classifier acl l3v4 rule global_mfc ordinal 1002 match ipv4-tos 160
set forwarding-options class-of-service multifield-classifier acl l3v4 rule global_mfc ordinal 1002 match source-ipv4-prefix 132.1.1.3/32
set forwarding-options class-of-service multifield-classifier acl l3v4 rule global_mfc ordinal 1002 action forward-class class-1
set forwarding-options class-of-service multifield-classifier acl l3v4 rule global_mfc ordinal 1003
set forwarding-options class-of-service multifield-classifier acl l3v4 rule global_mfc ordinal 1003 match ipv4-tos 192
set forwarding-options class-of-service multifield-classifier acl l3v4 rule global_mfc ordinal 1003 match source-ipv4-prefix 132.1.1.3/32
set forwarding-options class-of-service multifield-classifier acl l3v4 rule global_mfc ordinal 1003 action forward-class class-2
set forwarding-options class-of-service multifield-classifier acl l3v4 rule global_mfc ordinal 1004
set forwarding-options class-of-service multifield-classifier acl l3v4 rule global_mfc ordinal 1004 match ipv4-tos 224
set forwarding-options class-of-service multifield-classifier acl l3v4 rule global_mfc ordinal 1004 match source-ipv4-prefix 132.1.1.3/32
set forwarding-options class-of-service multifield-classifier acl l3v4 rule global_mfc ordinal 1004 action forward-class class-3
commit
The configuration of the QoS MFC-based Classifier for classification of downstream traffic from the core towards IPoE Subscriber is shown below.
supervisor@rtbrick>C-BNG.rtbrick.net: cfg> show config forwarding-options class-of-service multifield-classifier acl l3v4 rule global_mfc
{
    "rtbrick-config:rule": [
      {
        "rule-name": "global_mfc",
        "ordinal": [
          {
            "ordinal-value": 1001,
            "match": {
              "ipv4-tos": 128,
              "source-ipv4-prefix": "132.1.1.3/32"
            },
            "action": {
              "forward-class": "class-0"
            }
          },
          {
            "ordinal-value": 1002,
            "match": {
              "ipv4-tos": 160,
              "source-ipv4-prefix": "132.1.1.3/32"
            },
            "action": {
              "forward-class": "class-1"
            }
          },
          {
            "ordinal-value": 1003,
            "match": {
              "ipv4-tos": 192,
              "source-ipv4-prefix": "132.1.1.3/32"
            },
            "action": {
              "forward-class": "class-2"
            }
          },
          {
            "ordinal-value": 1004,
            "match": {
              "ipv4-tos": 224,
              "source-ipv4-prefix": "132.1.1.3/32"
            },
            "action": {
              "forward-class": "class-3"
            }
          }
        ]
      }
    ]
  }
-
Enqueue classified traffic to different queues using class-to-queue mapping.
set forwarding-options class-of-service queue-group subs-4queues queue-numbers 4
set forwarding-options class-of-service class-queue-map subs-4queues
set forwarding-options class-of-service class-queue-map subs-4queues class class-0
set forwarding-options class-of-service class-queue-map subs-4queues class class-0 queue-name BE_SUBS
set forwarding-options class-of-service class-queue-map subs-4queues class class-1
set forwarding-options class-of-service class-queue-map subs-4queues class class-1 queue-name LD_SUBS
set forwarding-options class-of-service class-queue-map subs-4queues class class-2
set forwarding-options class-of-service class-queue-map subs-4queues class class-2 queue-name LL_SUBS
set forwarding-options class-of-service class-queue-map subs-4queues class class-3
set forwarding-options class-of-service class-queue-map subs-4queues class class-3 queue-name VO_SUBS
commit
Below is the QoS class-queue mapping configuration:
supervisor@rtbrick>C-BNG.rtbrick.net: cfg> show config forwarding-options class-of-service class-queue-map subs-4queues class
{
    "rtbrick-config:class": [
      {
        "class-type": "class-0",
        "queue-name": "BE_SUBS"
      },
      {
        "class-type": "class-1",
        "queue-name": "LD_SUBS"
      },
      {
        "class-type": "class-2",
        "queue-name": "LL_SUBS"
      },
      {
        "class-type": "class-3",
        "queue-name": "VO_SUBS"
      }
    ]
  }
-
Configure the queues needed for enqueuing and dequeuing traffic streams.
set forwarding-options class-of-service queue BE_SUBS
set forwarding-options class-of-service queue BE_SUBS queue-size 375000
set forwarding-options class-of-service queue LD_SUBS
set forwarding-options class-of-service queue LD_SUBS queue-size 625000
set forwarding-options class-of-service queue LL_SUBS
set forwarding-options class-of-service queue LL_SUBS queue-size 625000
set forwarding-options class-of-service queue VO_SUBS
set forwarding-options class-of-service queue VO_SUBS queue-size 156250
set forwarding-options class-of-service queue VO_SUBS shaper-name shaper_VO
commit
The queue Configuration is shown below.
supervisor@rtbrick>C-BNG.rtbrick.net: cfg> show config forwarding-options class-of-service queue
{
  "rtbrick-config:queue": [
    {
      "queue-name": "BE_SUBS",
      "queue-size": 375000,
    },
    {
      "queue-name": "LD_SUBS",
      "queue-size": 625000,
    },
    {
      "queue-name": "LL_SUBS",
      "queue-size": 625000,
    },
    {
      "queue-name": "VO_SUBS",
      "queue-size": 156250,
      "shaper-name": "shaper_VO",
    }
  ]
}
-
Configure the scheduler needed by Subscriber/Session scheduler-map and OLT scheduler-map.
set forwarding-options class-of-service scheduler pon0
set forwarding-options class-of-service scheduler pon0 type fair_queueing
set forwarding-options class-of-service scheduler pon0 shaper-name gpon-shaper
set forwarding-options class-of-service scheduler subs-4queues
set forwarding-options class-of-service scheduler subs-4queues shaper-name shaper_session
set forwarding-options class-of-service scheduler subs-4queues type strict_priority
set forwarding-options class-of-service scheduler subs-4queues composite false
commit
The configuration of the scheduler-map and OLT scheduler-map is shown below.
supervisor@rtbrick>C-BNG.rtbrick.net: cfg> show config  forwarding-options class-of-service scheduler
{
  "rtbrick-config:scheduler": [
    {
      "scheduler-name": "pon0",
      "shaper-name": "gpon-shaper",
      "type": "fair_queueing"
    },
    {
      "scheduler-name": "subs-4queues",
      "shaper-name": "shaper_session",
      "type": "strict_priority",
      "composite": "false"
    }
  ]
}
-
Configure the session/subscriber scheduler mapping for dequeuing traffic based on scheduler type for each queue:
set forwarding-options class-of-service scheduler-map schedmap-olt
set forwarding-options class-of-service scheduler-map schedmap-olt scheduler-name pon0
set forwarding-options class-of-service scheduler-map schedmap-olt scheduler-name pon0 port-connection scheduler_to_port
set forwarding-options class-of-service scheduler-map subs-4queues-residential
set forwarding-options class-of-service scheduler-map subs-4queues-residential queue-group-name subs-4queues
set forwarding-options class-of-service scheduler-map subs-4queues-residential queue-group-name subs-4queues queue-name BE_SUBS
set forwarding-options class-of-service scheduler-map subs-4queues-residential queue-group-name subs-4queues queue-name BE_SUBS parent-flow high-flow
set forwarding-options class-of-service scheduler-map subs-4queues-residential queue-group-name subs-4queues queue-name BE_SUBS parent-scheduler-name subs-4queues
set forwarding-options class-of-service scheduler-map subs-4queues-residential queue-group-name subs-4queues queue-name BE_SUBS connection-point strict_priority_3
set forwarding-options class-of-service scheduler-map subs-4queues-residential queue-group-name subs-4queues queue-name LD_SUBS
set forwarding-options class-of-service scheduler-map subs-4queues-residential queue-group-name subs-4queues queue-name LD_SUBS parent-flow high-flow
set forwarding-options class-of-service scheduler-map subs-4queues-residential queue-group-name subs-4queues queue-name LD_SUBS parent-scheduler-name subs-4queues
set forwarding-options class-of-service scheduler-map subs-4queues-residential queue-group-name subs-4queues queue-name LD_SUBS connection-point strict_priority_1
set forwarding-options class-of-service scheduler-map subs-4queues-residential queue-group-name subs-4queues queue-name LL_SUBS
set forwarding-options class-of-service scheduler-map subs-4queues-residential queue-group-name subs-4queues queue-name LL_SUBS parent-flow high-flow
set forwarding-options class-of-service scheduler-map subs-4queues-residential queue-group-name subs-4queues queue-name LL_SUBS parent-scheduler-name subs-4queues
set forwarding-options class-of-service scheduler-map subs-4queues-residential queue-group-name subs-4queues queue-name LL_SUBS connection-point strict_priority_2
set forwarding-options class-of-service scheduler-map subs-4queues-residential queue-group-name subs-4queues queue-name VO_SUBS
set forwarding-options class-of-service scheduler-map subs-4queues-residential queue-group-name subs-4queues queue-name VO_SUBS parent-flow high-flow
set forwarding-options class-of-service scheduler-map subs-4queues-residential queue-group-name subs-4queues queue-name VO_SUBS parent-scheduler-name subs-4queues
set forwarding-options class-of-service scheduler-map subs-4queues-residential queue-group-name subs-4queues queue-name VO_SUBS connection-point strict_priority_0
set forwarding-options class-of-service scheduler-map subs-4queues-residential scheduler-name subs-4queues
set forwarding-options class-of-service scheduler-map subs-4queues-residential scheduler-name subs-4queues port-connection scheduler_to_port
commit
The QoS Subscriber/Session Scheduler-Map configuration is shown below:
supervisor@rtbrick>C-BNG.rtbrick.net: cfg> show config forwarding-options class-of-service scheduler-map subs-4queues-residential
{
  "rtbrick-config:scheduler-map": [
    {
      "scheduler-map-name": "subs-4queues-residential",
      "queue-group-name": [
        {
          "group-name": "subs-4queues",
          "queue-name": [
            {
              "name": "BE_SUBS",
              "parent-flow": "high-flow",
              "parent-scheduler-name": "subs-4queues",
              "connection-point": "strict_priority_3"
            },
            {
              "name": "LD_SUBS",
              "parent-flow": "high-flow",
              "parent-scheduler-name": "subs-4queues",
              "connection-point": "strict_priority_1"
            },
            {
              "name": "LL_SUBS",
              "parent-flow": "high-flow",
              "parent-scheduler-name": "subs-4queues",
              "connection-point": "strict_priority_2"
            },
            {
              "name": "VO_SUBS",
              "parent-flow": "high-flow",
              "parent-scheduler-name": "subs-4queues",
              "connection-point": "strict_priority_0"
            }
          ]
        }
      ],
      "scheduler-name": [
        {
          "name": "subs-4queues",
          "port-connection": "scheduler_to_port"
        }
      ]
    }
  ]
}
-
Configure the OLT scheduler-mapping for each PON to be scheduled according to the scheduler type.
set forwarding-options class-of-service scheduler-map schedmap-olt
set forwarding-options class-of-service scheduler-map schedmap-olt scheduler-name pon0
set forwarding-options class-of-service scheduler-map schedmap-olt scheduler-name pon0 port-connection scheduler_to_port
commit
The OLT Scheduler-Map configuration is shown below:
supervisor@rtbrick>C-BNG.rtbrick.net: cfg> show config forwarding-options class-of-service scheduler-map schedmap-olt
{
  "rtbrick-config:scheduler-map": [
    {
      "scheduler-map-name": "schedmap-olt",
      "scheduler-name": [
        {
          "name": "pon0",
          "port-connection": "scheduler_to_port"
        }
      ]
    }
  ]
}
-
Configure downstream traffic shaping for both session schedulers and queues.
|
|
Queue Shaping is only on VO_SUBS Queue. |
set forwarding-options class-of-service shaper shaper_VO
set forwarding-options class-of-service shaper shaper_VO shaping-rate-high 2000
set forwarding-options class-of-service shaper shaper_VO shaping-rate-low 0
set forwarding-options class-of-service shaper shaper_session
set forwarding-options class-of-service shaper shaper_session shaping-rate-high 10000
set forwarding-options class-of-service shaper shaper_session shaping-rate-low 100
set forwarding-options class-of-service shaper gpon-shaper
set forwarding-options class-of-service shaper gpon-shaper shaping-rate-high 2488000
set forwarding-options class-of-service shaper gpon-shaper shaping-rate-low 32000
commit
The shaping Configuration is shown below.
supervisor@rtbrick>C-BNG.rtbrick.net: cfg> show config forwarding-options class-of-service shaper
{
  "rtbrick-config:shaper": [
    {
      "shaper-name": "shaper_VO",
      "shaping-rate-high": 2000,
      "shaping-rate-low": 0
    },
    {
      "shaper-name": "shaper_session",
      "shaping-rate-high": 10000,
      "shaping-rate-low": 100
    },
    {
      "shaper-name": "gpon-shaper",
      "shaping-rate-high": 2488000,
      "shaping-rate-low": 32000
    }
  ]
}
4.2.3. Configure Upstream QoS
-
Configure the BA Classifier for the classification of multiple traffic streams targeted at IPoE subscribers:
set forwarding-options class-of-service classifier subs-pbit-class
set forwarding-options class-of-service classifier subs-pbit-class match-type ieee-802.1
set forwarding-options class-of-service classifier subs-pbit-class match-type ieee-802.1 codepoint 1
set forwarding-options class-of-service classifier subs-pbit-class match-type ieee-802.1 codepoint 1 class class-0
set forwarding-options class-of-service classifier subs-pbit-class match-type ieee-802.1 codepoint 1 remark-codepoint 7
set forwarding-options class-of-service classifier subs-pbit-class match-type ieee-802.1 codepoint 2
set forwarding-options class-of-service classifier subs-pbit-class match-type ieee-802.1 codepoint 2 class class-1
set forwarding-options class-of-service classifier subs-pbit-class match-type ieee-802.1 codepoint 2 remark-codepoint 7
set forwarding-options class-of-service classifier subs-pbit-class match-type ieee-802.1 codepoint 3
set forwarding-options class-of-service classifier subs-pbit-class match-type ieee-802.1 codepoint 3 class class-2
set forwarding-options class-of-service classifier subs-pbit-class match-type ieee-802.1 codepoint 3 remark-codepoint 7
set forwarding-options class-of-service classifier subs-pbit-class match-type ieee-802.1 codepoint 4
set forwarding-options class-of-service classifier subs-pbit-class match-type ieee-802.1 codepoint 4 class class-3
set forwarding-options class-of-service classifier subs-pbit-class match-type ieee-802.1 codepoint 4 remark-codepoint 7
commit
The configuration of the QoS BA-based Classifier for classification of upstream traffic towards IPoE Subscriber is shown below.
 supervisor@rtbrick>C-BNG.rtbrick.net: cfg> show config forwarding-options class-of-service classifier subs-pbit-class
{
  "rtbrick-config:classifier": [
    {
      "classifier-name": "subs-pbit-class",
      "match-type": [
        {
          "match-type": "ieee-802.1",
          "codepoint": [
            {
              "codepoint": 1,
              "class": "class-0",
              "remark-codepoint": 7
            },
            {
              "codepoint": 2,
              "class": "class-1",
              "remark-codepoint": 7
            },
            {
              "codepoint": 3,
              "class": "class-2",
              "remark-codepoint": 7
            },
            {
              "codepoint": 4,
              "class": "class-3",
              "remark-codepoint": 7
            }
          ]
        }
      ]
    }
  ]
}
-
Configure multi-level policer to police 4-Level traffic.
set forwarding-options class-of-service policer policer-residential
set forwarding-options class-of-service policer policer-residential level1-rates cir 2000
set forwarding-options class-of-service policer policer-residential level1-rates cbs 1000
set forwarding-options class-of-service policer policer-residential level1-rates pir 2500
set forwarding-options class-of-service policer policer-residential level1-rates pbs 1000
set forwarding-options class-of-service policer policer-residential level2-rates cir 3000
set forwarding-options class-of-service policer policer-residential level2-rates cbs 1000
set forwarding-options class-of-service policer policer-residential level2-rates pir 3500
set forwarding-options class-of-service policer policer-residential level2-rates pbs 1000
set forwarding-options class-of-service policer policer-residential level3-rates cir 4000
set forwarding-options class-of-service policer policer-residential level3-rates cbs 1000
set forwarding-options class-of-service policer policer-residential level3-rates pir 4500
set forwarding-options class-of-service policer policer-residential level3-rates pbs 1000
set forwarding-options class-of-service policer policer-residential level4-rates cir 1000
set forwarding-options class-of-service policer policer-residential level4-rates cbs 1000
set forwarding-options class-of-service policer policer-residential level4-rates pir 1500
set forwarding-options class-of-service policer policer-residential level4-rates pbs 1000
set forwarding-options class-of-service policer policer-residential levels 4
set forwarding-options class-of-service policer policer-residential type two-rate-three-color
commit
The multi-level policer configuration is shown below:
supervisor@rtbrick>C-BNG.rtbrick.net: cfg> show config forwarding-options class-of-service policer policer-residential
{
  "rtbrick-config:policer": [
    {
      "policer-name": "policer-residential",
      "level1-rates": {
        "cir": 2000,
        "cbs": 1000,
        "pir": 2500,
        "pbs": 1000
      },
      "level2-rates": {
        "cir": 3000,
        "cbs": 1000,
        "pir": 3500,
        "pbs": 1000
      },
      "level3-rates": {
        "cir": 4000,
        "cbs": 1000,
        "pir": 4500,
        "pbs": 1000
      },
      "level4-rates": {
        "cir": 1000,
        "cbs": 1000,
        "pir": 1500,
        "pbs": 1000
      },
      "levels": 4,
      "type": "two-rate-three-color"
    }
  ]
}
-
Map the classified traffic streams to different policer levels using class-to-policer mapping:
set forwarding-options class-of-service class-policer-map policer-map-residential
set forwarding-options class-of-service class-policer-map policer-map-residential class class-0
set forwarding-options class-of-service class-policer-map policer-map-residential class class-0 policer-level level-1
set forwarding-options class-of-service class-policer-map policer-map-residential class class-1
set forwarding-options class-of-service class-policer-map policer-map-residential class class-1 policer-level level-2
set forwarding-options class-of-service class-policer-map policer-map-residential class class-2
set forwarding-options class-of-service class-policer-map policer-map-residential class class-2 policer-level level-3
set forwarding-options class-of-service class-policer-map policer-map-residential class class-3
set forwarding-options class-of-service class-policer-map policer-map-residential class class-3 policer-level level-4
commit
The class-policer-map configuration is shown below:
supervisor@rtbrick>C-BNG.rtbrick.net: cfg> show config forwarding-options class-of-service class-policer-map policer-map-residential class
{
  "rtbrick-config:class": [
    {
      "class": "class-0",
      "policer-level": "level-1"
    },
    {
      "class": "class-1",
      "policer-level": "level-2"
    },
    {
      "class": "class-2",
      "policer-level": "level-3"
    },
    {
      "class": "class-3",
      "policer-level": "level-4"
    }
  ]
}
4.2.4. Configure QoS Remarking
-
Remark downstream traffic egressing from subscriber interface (egress remarking).
set forwarding-options class-of-service remark-map subs-remarking-residential
set forwarding-options class-of-service remark-map subs-remarking-residential remark-type ieee-802.1
set forwarding-options class-of-service remark-map subs-remarking-residential remark-type ieee-802.1 match-codepoint 1
set forwarding-options class-of-service remark-map subs-remarking-residential remark-type ieee-802.1 match-codepoint 1 color all
set forwarding-options class-of-service remark-map subs-remarking-residential remark-type ieee-802.1 match-codepoint 1 color all remark-codepoint 6
set forwarding-options class-of-service remark-map subs-remarking-residential remark-type ieee-802.1 match-codepoint 2
set forwarding-options class-of-service remark-map subs-remarking-residential remark-type ieee-802.1 match-codepoint 2 color all
set forwarding-options class-of-service remark-map subs-remarking-residential remark-type ieee-802.1 match-codepoint 2 color all remark-codepoint 6
set forwarding-options class-of-service remark-map subs-remarking-residential remark-type ieee-802.1 match-codepoint 3
set forwarding-options class-of-service remark-map subs-remarking-residential remark-type ieee-802.1 match-codepoint 3 color all
set forwarding-options class-of-service remark-map subs-remarking-residential remark-type ieee-802.1 match-codepoint 3 color all remark-codepoint 6
set forwarding-options class-of-service remark-map subs-remarking-residential remark-type ieee-802.1 match-codepoint 4
set forwarding-options class-of-service remark-map subs-remarking-residential remark-type ieee-802.1 match-codepoint 4 color all
set forwarding-options class-of-service remark-map subs-remarking-residential remark-type ieee-802.1 match-codepoint 4 color all remark-codepoint 6
commit
The remarking configuration is shown below:
supervisor@rtbrick>C-BNG.rtbrick.net: cfg> show config forwarding-options class-of-service remark-map subs-remarking-residential
{
  "rtbrick-config:remark-map": [
    {
      "remark-map-name": "subs-remarking-residential",
      "remark-type": [
        {
          "remark-type": "ieee-802.1",
          "match-codepoint": [
            {
              "match-codepoint": 1,
              "color": [
                {
                  "color": "all",
                  "remark-codepoint": 6
                }
              ]
            },
            {
              "match-codepoint": 2,
              "color": [
                {
                  "color": "all",
                  "remark-codepoint": 6
                }
              ]
            },
            {
              "match-codepoint": 3,
              "color": [
                {
                  "color": "all",
                  "remark-codepoint": 6
                }
              ]
            },
            {
              "match-codepoint": 4,
              "color": [
                {
                  "color": "all",
                  "remark-codepoint": 6
                }
              ]
            }
          ]
        }
      ]
    }
  ]
}
-
Remark upstream traffic ingressing to a subscriber’s interface [ingress remarking]
|
|
In the upstream traffic classifier configuration shown below, remarking of all traffic streams with code point '7' is done. |
set forwarding-options class-of-service classifier subs-pbit-class
set forwarding-options class-of-service classifier subs-pbit-class match-type ieee-802.1
set forwarding-options class-of-service classifier subs-pbit-class match-type ieee-802.1 codepoint 1
set forwarding-options class-of-service classifier subs-pbit-class match-type ieee-802.1 codepoint 1 class class-0
set forwarding-options class-of-service classifier subs-pbit-class match-type ieee-802.1 codepoint 1 remark-codepoint 7
set forwarding-options class-of-service classifier subs-pbit-class match-type ieee-802.1 codepoint 2
set forwarding-options class-of-service classifier subs-pbit-class match-type ieee-802.1 codepoint 2 class class-1
set forwarding-options class-of-service classifier subs-pbit-class match-type ieee-802.1 codepoint 2 remark-codepoint 7
set forwarding-options class-of-service classifier subs-pbit-class match-type ieee-802.1 codepoint 3
set forwarding-options class-of-service classifier subs-pbit-class match-type ieee-802.1 codepoint 3 class class-2
set forwarding-options class-of-service classifier subs-pbit-class match-type ieee-802.1 codepoint 3 remark-codepoint 7
set forwarding-options class-of-service classifier subs-pbit-class match-type ieee-802.1 codepoint 4
set forwarding-options class-of-service classifier subs-pbit-class match-type ieee-802.1 codepoint 4 class class-3
set forwarding-options class-of-service classifier subs-pbit-class match-type ieee-802.1 codepoint 4 remark-codepoint 7
commit
Below is the remarking configuration:
supervisor@rtbrick>C-BNG.rtbrick.net: cfg> show config forwarding-options class-of-service classifier subs-pbit-class
{
  "rtbrick-config:classifier": [
    {
      "classifier-name": "subs-pbit-class",
      "match-type": [
        {
          "match-type": "ieee-802.1",
          "codepoint": [
            {
              "codepoint": 1,
              "class": "class-0",
              "remark-codepoint": 7
            },
            {
              "codepoint": 2,
              "class": "class-1",
              "remark-codepoint": 7
            },
            {
              "codepoint": 3,
              "class": "class-2",
              "remark-codepoint": 7
            },
            {
              "codepoint": 4,
              "class": "class-3",
              "remark-codepoint": 7
            }
          ]
        }
      ]
    }
  ]
}
4.3. Configure Mirroring for Downstream Traffic Remark Validation
4.3.1. Configure Mirroring for Downstream Traffic
set forwarding-options mirror m1 source interface ifp-0/1/30
set forwarding-options mirror m1 source direction egress
set forwarding-options mirror m1 destination interface cpu-0/0/200
commit
4.3.2. Validate the downstream traffic remarking
|
|
This validation requires mirroring the subscriber access interface on the C-BNG device. |
supervisor@rtbrick>C-BNG.rtbrick.net: cfg> show config forwarding-options mirror
{
  "rtbrick-config:mirror": [
    {
      "name": "m1",
      "destination": {
        "interface": "cpu-0/0/200"
      },
      "source": {
        "direction": "egress",
        "interface": "ifp-0/1/30"
      }
    }
  ]
}
The capture mirroring can be performed as shown below.
supervisor@rtbrick>C-BNG.rtbrick.net: cfg> capture mirror

2023-04-03T13:58:59.651227+0000 e8:c5:7a:8f:76:f1 > 02:00:00:00:00:01, ethertype 802.1Q (0x8100), length 1022: vlan 1001, p 6, ethertype 802.1Q, vlan 1001, p 6, ethertype IPv4, (tos 0xe0, ttl 63, id 0, offset 0, flags [DF], proto UDP (17), length 1000)
    192.0.2.2.65056 > 203.0.113.1.65056: UDP, length 972

2023-04-03T13:58:59.651306+0000 e8:c5:7a:8f:76:f1 > 02:00:00:00:00:01, ethertype 802.1Q (0x8100), length 1022: vlan 1001, p 6, ethertype 802.1Q, vlan 1001, p 6, ethertype IPv4, (tos 0xe0, ttl 63, id 0, offset 0, flags [DF], proto UDP (17), length 1000)
    192.0.2.2.65056 > 203.0.113.1.65056: UDP, length 972
4.3.3. Configure Mirroring for Upstream Traffic Remark Validation
set forwarding-options mirror m1 source interface ifp-0/1/30
set forwarding-options mirror m1 source direction ingress
set forwarding-options mirror m1 destination interface cpu-0/0/200
commit
4.3.4. Validating the upstream traffic remarking
|
|
Mirror the core facing port on the C-BNG device as shown below. |
supervisor@rtbrick>C-BNG.rtbrick.net: cfg> show config forwarding-options mirror m1
{
  "rtbrick-config:mirror": [
    {
      "name": "m1",
      "destination": {
        "interface": "cpu-0/0/200"
      },
      "source": {
        "direction": "ingress",
        "interface": "ifp-0/1/30"
      }
    }
  ]
}
The capture mirroring can be performed as shown below. It confirms all four traffic streams noted with codepoint=7.
supervisor@rtbrick>C-BNG.rtbrick.net: cfg> capture mirror

2023-04-03T13:53:31.400011+0000 02:00:00:00:00:01 > e8:c5:7a:8f:76:f1, ethertype 802.1Q (0x8100), length 1022: vlan 1001, p 2, ethertype 802.1Q, vlan 1001, p 2, ethertype IPv4, (tos 0xa0, ttl 64, id 0, offset 0, flags [DF], proto UDP (17), length 1000)
    203.0.113.1.65056 > 192.0.2.2.65056: UDP, length 972

2023-04-03T13:53:31.400167+0000 02:00:00:00:00:01 > e8:c5:7a:8f:76:f1, ethertype 802.1Q (0x8100), length 1022: vlan 1001, p 3, ethertype 802.1Q, vlan 1001, p 3, ethertype IPv4, (tos 0xc0, ttl 64, id 0, offset 0, flags [DF], proto UDP (17), length 1000)
    203.0.113.1.65056 > 192.0.2.2.65056: UDP, length 972
4.4. Configure FreeRADIUS Server
4.4.1. Installation of FreeRADIUS
FreeRADIUS server can be installed on any Linux OS distribution. For information about installing FreeRADIUS, see Installing the FreeRADIUS Server.
4.4.2. Remove the Unsupported Files
It is necessary to remove echo, ntlm_auth, eap, echo, and mschap files once FreeRadius has been installed, since they are not required by this reference design. To remove these files, enter the following commands:
rm -rf /etc/freeradius/3.0/mods-enabled/echo
rm -rf /etc/freeradius/3.0/mods-enabled/ntlm_auth
rm -rf /etc/freeradius/3.0/mods-enabled/eap
rm -rf /etc/freeradius/3.0/mods-enabled/echo
rm -rf /etc/freeradius/3.0/mods-enabled/mschap
4.4.3. FreeRADIUS User and Group Settings
Using the following commands, one can set the user or group as root.
sed -i 's/User=freerad/User=root/g' /lib/systemd/system/freeradius.service
sed -i 's/Group=freerad/Group=root/g' /lib/systemd/system/freeradius.service
Run the command for reloading 'systemd' after user or group settings:
systemctl daemon-reload
4.4.4. Configure the FreeRADIUS Files
It is necessary to configure the FreeRADIUS files once FreeRadius has been installed. The configuration files can be found under /etc/freeradius/3.0/.
authorize
Using the following command, one can view the authorize file in its default location.
~:/etc/freeradius/3.0 # cat mods-config/files/authorize
Replace the content of the authorize file with the following:
$INCLUDE /etc/freeradius/3.0/ipoe_users_file
|
|
This file can also be downloaded from the appendix (Appendix C: RADIUS Server Configuration). |
ipoe_users_file
The IPoE Users file (ipoe_users_file) mentioned in the above section includes subscriber profile parameters as shown below.
"02:00:00:00:00:01@ipoe" Cleartext-Password := "ipoe"
    Service-Type = Framed-User,
    Class = IPOE,
    Framed-IP-Address = 203.0.113.1,
    Framed-IP-Netmask = 255.255.255.255,
    RtBrick-DNS-Primary = 203.0.113.200,
    RtBrick-DNS-Secondary  = 203.0.113.201,
    Framed-IPv6-Prefix = 2001:db8:0:1::1/128,
    Delegated-IPv6-Prefix = 2001:db8:0:3::/64,
    RtBrick-DNS-Primary-IPv6  = 2001:db8:0:20::1,
    RtBrick-DNS-Secondary-IPv6 = 2001:db8:0:20::2,
    Session-Timeout = 0,
    Idle-Timeout = 0,
    Reply-Message = "FOOBAR Internet",
    Acct-Interim-Interval = 120,
    RtBrick-QoS-Profile = "residential"

DEFAULT User-Name =~ '^[0-9a-f\:]+@ipoe$', Cleartext-Password := 'ipoe'
    Service-Type = Framed-User,
    Class = "IPOE",
    Acct-Interim-Interval = 900
The ipoe_users_file can be created with the above content in the /etc/freeradius/3.0/ path. Alternatively, this file can be downloaded from the appendix section of this guide and placed at /etc/freeradius/3.0/.
clients.conf
Clients.conf file shall be configured with the expected RADIUS client IP address and secret.
~:/etc/freeradius/3.0 # cat clients.conf
client rtbrick {
        ipaddr          = 192.0.2.74
        secret          = testing123
        shortname       = rtbrick
        nas_type        = other
        require_message_authenticator = no
}
The clients.conf file (/etc/freeradius/3.0/clients.conf) used for this reference design can be downloaded from the appendix section of this guide.
radiusd.conf
The radiusd.conf file should be configured with the expected RADIUS authentication and accounting parameters.
prefix = /usr
exec_prefix = /usr
sysconfdir = /etc
localstatedir = /var
sbindir = ${exec_prefix}/sbin
logdir = /var/log/freeradius
raddbdir = /etc/freeradius
radacctdir = ${logdir}/radacct
name = freeradius
confdir = ${raddbdir}
modconfdir = ${confdir}/mods-config
run_dir = ${localstatedir}/run/${name}
db_dir = ${raddbdir}
libdir = /usr/lib/freeradius
pidfile = ${run_dir}/${name}.pid
correct_escapes = true
max_request_time = 5
cleanup_delay = 0
max_requests = 16384
hostname_lookups = no
log {
    destination = files
    file = ${logdir}/radius.log
    stripped_names = no
    auth = yes
}
checkrad = ${sbindir}/checkrad
security {
    # user = radius
    # group = radius
    allow_core_dumps = no
    max_attributes = 200
    reject_delay = 0
    status_server = no
@openssl_version_check_config@
}
proxy_requests  = no
$INCLUDE clients.conf
thread pool {
    start_servers = 32
    max_servers = 128
    min_spare_servers = 8
    max_spare_servers = 16
    max_queue_size = 16384
    max_requests_per_server = 0
    auto_limit_acct = no
}
modules {
    $INCLUDE mods-enabled/
}
instantiate {
    files
    linelog
}
server default {
    listen {
        type = auth
        ipaddr = *
        port = 1812
    }
    listen {
        type = acct
        ipaddr = *
        port = 1813
    }
    authorize {
        update request {
            FreeRADIUS-Client-Shortname = "%{&request:Client-Shortname}"
        }
        if (&request:Client-Shortname == "rtbrick-server") {
            rtbrick-server-log
        }
        files
        pap
    }
    authenticate {
        pap
    }
    post-auth {
        if (&request:Client-Shortname == "rtbrick-server") {
            rtbrick-server-log
        }
        Post-Auth-Type REJECT {
            update reply {
                Reply-Message := "Login Failed. Please check your username and password."
            }
            attr_filter.access_reject
        }
    }
    preacct {
        ok
    }
    accounting {
        if (&request:Client-Shortname == "rtbrick-server") {
            rtbrick-server-log
        }
    ok
    }
    session {
    }
}
Radiusd.conf should be configured to use UDP ports 1812 and 1813 for authentication and accounting, respectively. Additionally, rtbrick-server-log should be added to the parameters for authorise, authenticate, and accounting.
The radiusd.conf file (/etc/freeradius/3.0/radiusd.conf) used for this reference design can be downloaded from the appendix section (Appendix C) of this guide.
detail
The detail file shall be configured for the RADIUS accounting logs.
/etc/freeradius/3.0 # cat mods-enabled/detail
    permissions = 0666detail rtbrick-server-log {
    filename = ${radacctdir}/rtbrick-server-detail.log

    header = "%t;%{NAS-IP-Address};%I;%{Packet-Src-Port}"
    log_packet_header = no
}
Ensure that rtbrick-server-log is specified in the detail file.
The detail file (/etc/freeradius/3.0/mods-enabled/detail) used for this reference design can be downloaded from the appendix section (Appendix C) of this guide.
dictionary.rtbrick
Add the RtBrick RADIUS dictionary (dictionary.rtbrick) to /usr/share/freeradius/dictionary.rtbrick and include it in` /usr/share/freeradius/dictionary`.
The dictionary.rtbrick contains the RBFS attributes in FreeRADIUS format.
-
Click
to download the radius_config.zip, which contains thedictionary.rtbrickfile.
4.4.5. Stopping and Starting the FreeRADIUS Server for any Changes
For any changes, stop and restart the FreeRADIUS server.
To stop the server, enter the following command:
sudo service freeradius stop
To start the server, enter the following command:
sudo service freeradius start
The FreeRadius server is now ready to provide AAA (Authentication, Accounting & Authorization) services to logging in subscribers.
4.4.6. Displaying the RADIUS Service Status
Run the following command to determine whether RADIUS service is active:
sudo service freeradius status
4.5. Validating IPoE Subscriber Bring-Up
Using traffic streams on both upstream and downstream directions with traffic packets and bytes statistics, IPoE Subscriber sessions can be "ESTABLISHED".
The validation can be performed in two steps:
-
Establishing the IPoE subscriber
-
Pinging the subscriber IPv4/IPv6 address
4.5.1. BNG Blaster - IPoE Subscribers with Traffic Streams
Using BNG Blaster, which emulates IPoE clients, session traffic("session-traffic") and streams traffic with different code-points("streams"), one can test IPoE subscriber management feature.
The data traffic can be defined in Blaster by configuring session/streams traffic.
-
Session Traffic in Blaster can be enabled by specifying
"autostart": true. Once the session is established, traffic starts automatically. Eventually if you want to stop or start the traffic (session or streams), press F7/F8. -
Streams traffic in Blaster can be enabled by specifying
stream-group-idat both streams ("streams":) and access interface levels (interfaces:access).
For information about using BNG Blaster, see section 3.4.4.3, “Starting BNG Blaster”.
Validating the IPoE Session on BNG Blaster
To validate the IPoE Session on BNG Blaster, switch to the Service Node. On the BNG Blaster terminal, the count of the "Established" session will be 1. Also, the logging of the same terminal will display "ALL SESSIONS ESTABLISHED" and "ALL SESSION TRAFFIC FLOWS VERIFIED" as highlighted in the below image.
In the image below, one can see the details of the established Single Subscriber session.
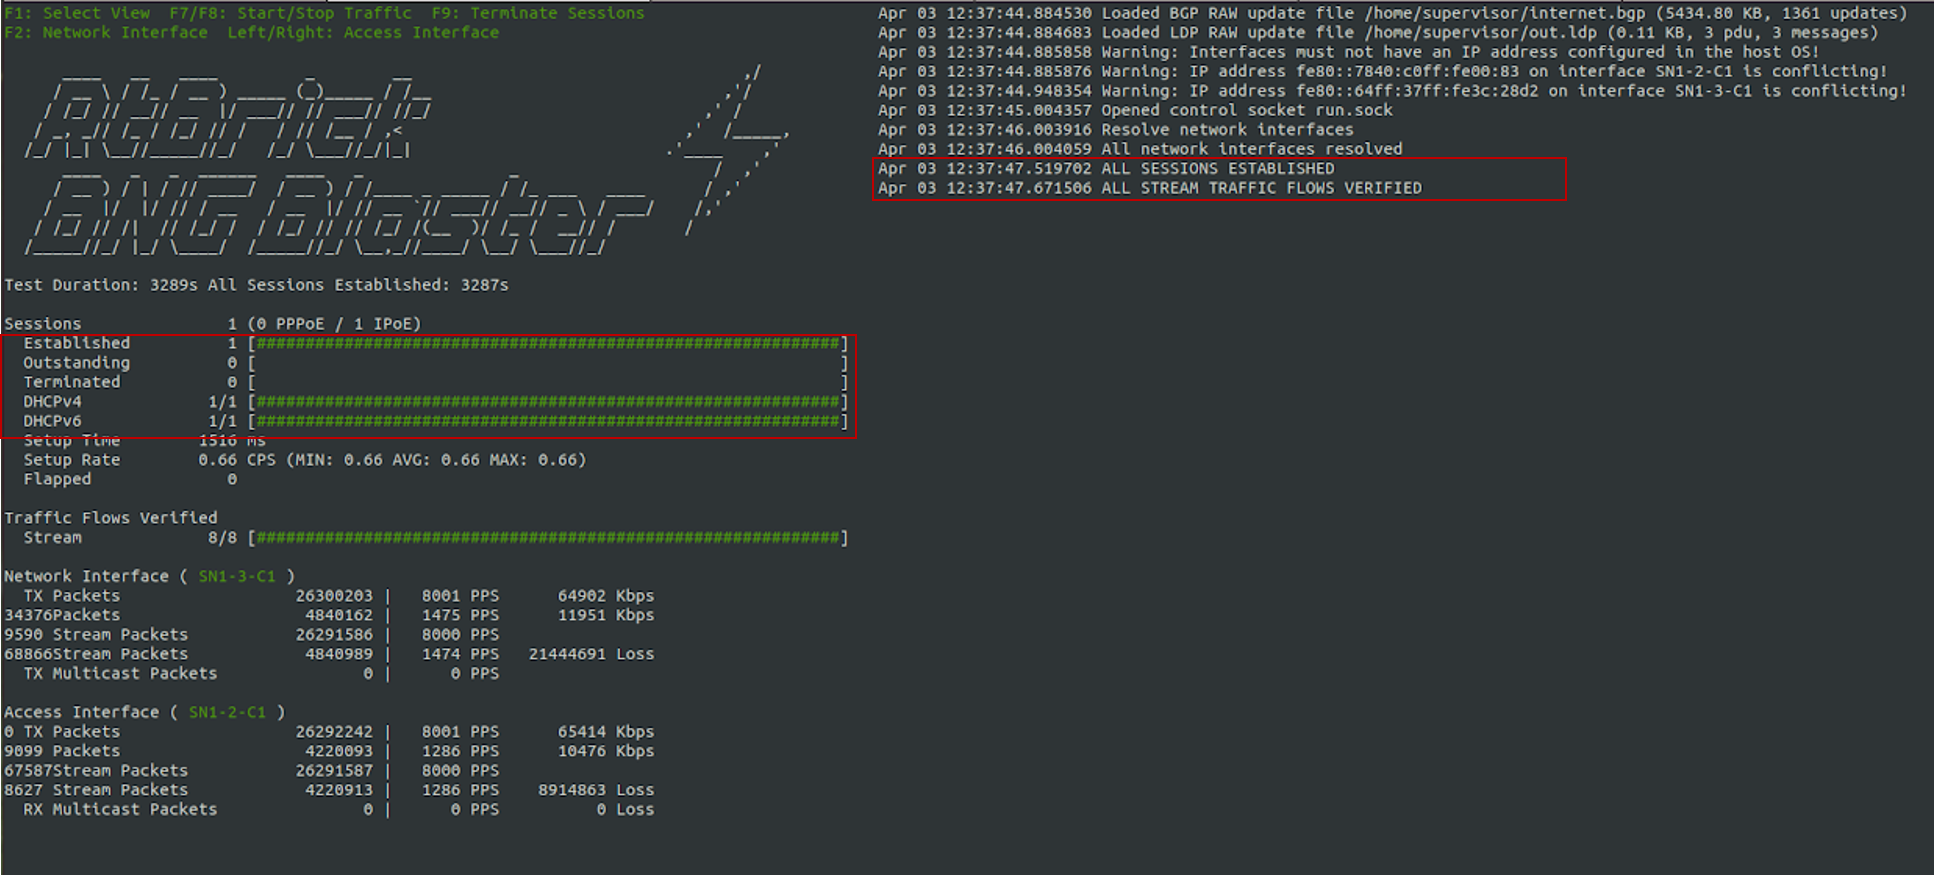
Fig 3: BNG Blaster terminal view
Visit the following URL for more information on BNG Blaster:
Viewing the Subscribers and the Subscriber Details on RBFS
Enter the following command to view the list of subscribers.
supervisor@rtbrick>C-BNG.rtbrick.net: cfg> show subscriber
Subscriber-Id          Interface        VLAN      Type   State
216454257090494470     ifp-0/1/30       1001:1001 IPoE   ESTABLISHED
supervisor@rtbrick>C-BNG.rtbrick.net: cfg>
Enter the following command to view the details of the subscriber with ID 216454257090494470.
supervisor@rtbrick>C-BNG.rtbrick.net: cfg> show subscriber 216454257090494470 detail
Subscriber-Id: 216454257090494470
    Type: IPoE
    State: ESTABLISHED
    Created: Mon Apr 03 13:51:17 GMT +0000 2023
    Interface: ifp-0/1/30
    Outer VLAN: 1001
    Inner VLAN: 1001
    Client MAC: 02:00:00:00:00:01
    Server MAC: e8:c5:7a:8f:76:f1
    IFL: ipoe-0/1/30/216454257090494470
    Username: 02:00:00:00:00:01@ipoe
    Access-Profile: ipoe
    AAA-Profile: aaa-profile
    Service-Profile: qos_service
    Reply-Message: FOOBAR Internet
    Session-Timeout: 0 (disabled)
    Idle-Timeout: 0 (disabled)
    MTU: 1500 Profile: N/A
    IPv4:
        Instance: default
        Address: 203.0.113.1/255.255.255.255
        Address Active: True
        Primary DNS: 203.0.113.200
        Secondary DNS: 203.0.113.201
    IPv6:
        Instance: default
        RA Prefix: 2001:db8:0:1::1/128
        RA Prefix Active: True
        Delegated Prefix (DHCPv6): 2001:db8:0:3::/64
        Delegated Prefix Active: True
        Primary DNS: 2001:db8:0:20::1
        Secondary DNS: 2001:db8:0:20::2
    Accounting:
        Session-Id: 216454257090494470:1680529877
        Start-Time: 2023-04-03T13:51:18.543868+0000
        Interims Interval: 120 seconds
supervisor@rtbrick>C-BNG.rtbrick.net: cfg>
Pinging the Subscriber (source: IPOE) from C-BNG
Before pinging a subscriber, use the show route <…> command to display the subscriber IPs at the C-BNG.
supervisor@rtbrick>C-BNG.rtbrick.net: cfg> show route ipv4 unicast source ipoe
Instance: default, AFI: ipv4, SAFI: unicast
Prefix/Label                             Source            Pref    Next Hop                                 Interface
203.0.113.1/32                           ipoe              7       -                                        ipoe-0/1/30/216454257090494470
supervisor@rtbrick>C-BNG.rtbrick.net: cfg>
supervisor@rtbrick>C-BNG.rtbrick.net: cfg> show route ipv6 unicast source ipoe
Instance: default, AFI: ipv6, SAFI: unicast
Prefix/Label                             Source            Pref    Next Hop                                 Interface
2001:db8:0:1::1/128                      ipoe              7       -                                        ipoe-0/1/30/216454257090494470
2001:db8:0:3::/64                        ipoe              7       fe80::ffff:ffff:ff00:1                   ipoe-0/1/30/216454257090494470
From the above list, ping 203.0.113.1 as shown below.
supervisor@rtbrick>C-BNG.rtbrick.net: cfg> ping 203.0.113.1
68 bytes from 203.0.113.1: icmp_seq=1 ttl=64 time=1.3463 ms
68 bytes from 203.0.113.1: icmp_seq=2 ttl=64 time=10.5234 ms
68 bytes from 203.0.113.1: icmp_seq=3 ttl=64 time=9.8053 ms
68 bytes from 203.0.113.1: icmp_seq=4 ttl=64 time=11.0041 ms
68 bytes from 203.0.113.1: icmp_seq=5 ttl=64 time=10.9300 ms
Statistics: 5 sent, 5 received, 0% packet loss
supervisor@rtbrick>C-BNG.rtbrick.net: cfg>
Validating Traffic Streams
Traffic streams can be used to perform various forwarding verifications.
For upstream traffic capture, enter the following command:
capture interface ifp-0/1/30 direction in
For downstream traffic capture, enter the following command:
capture interface ifp-0/1/30 direction out
Here, ifp-0/1/30 refers to the access interface.
4.5.2. Validating the IPoE QoS on BNG Blaster
To validate the IPoE QoS on BNG Blaster, switch to the Service Node. Navigate to the Streams and Session Traffic terminal by pressing F1 function key in your keyboard.
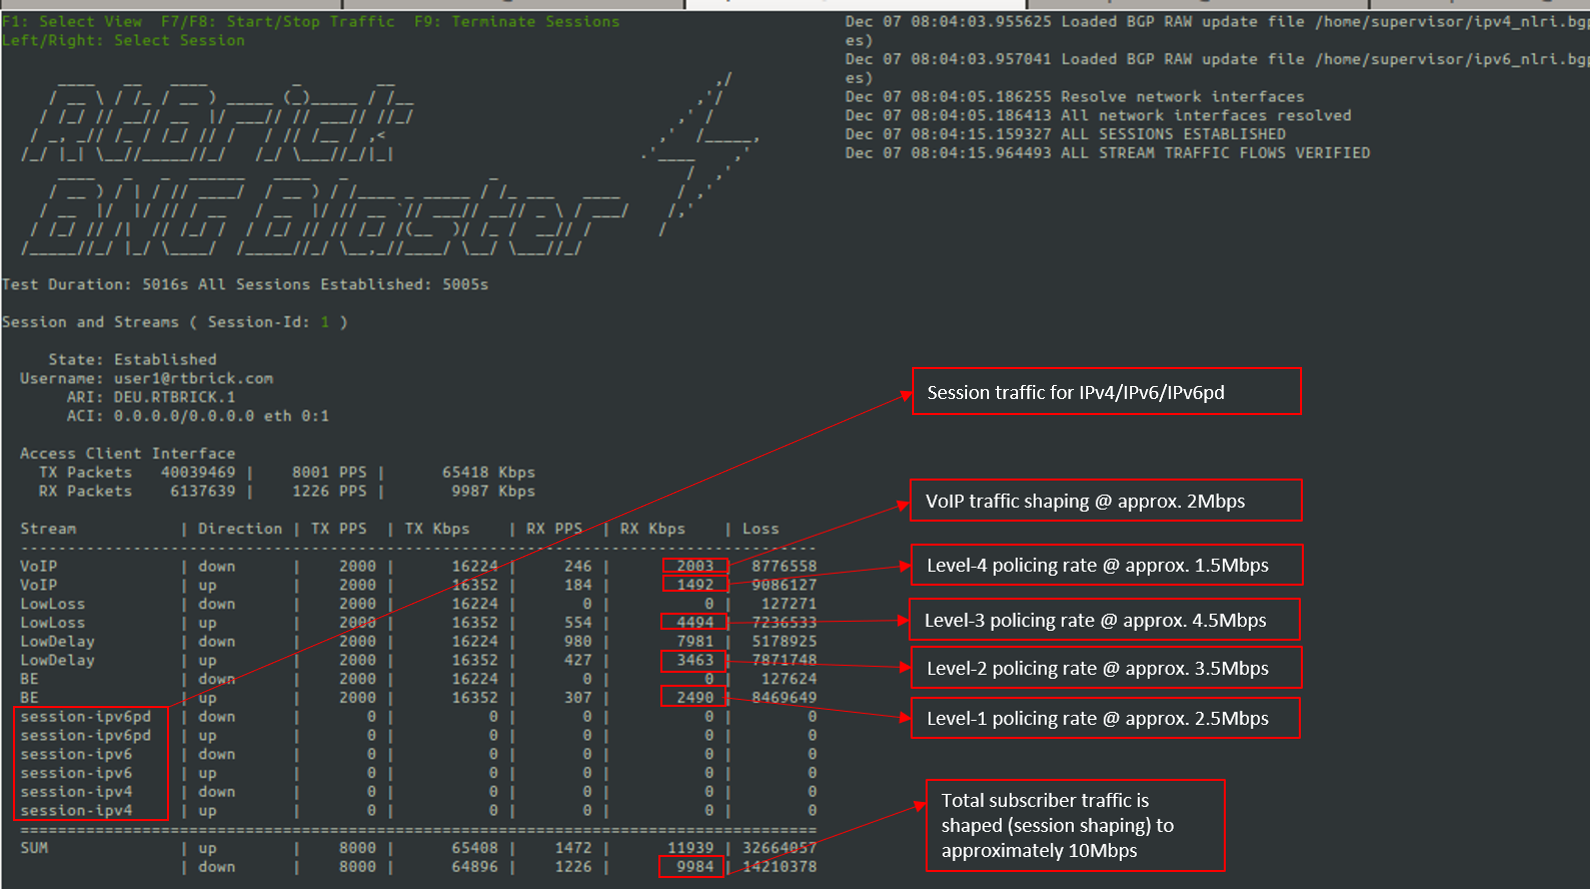
Fig 4: Reading output from BNG Blaster
As shown in the above image, the VoIP downstream traffic has been shaped (session shaping) to 2Mbps. Similarly, the total subscriber traffic has been shaped approximately to 10Mbps.
Following are the upstream traffic rates of different policer levels:
-
Level-1 Rates ~=2.5Mbps
-
Level-2 Rates ~=3.5Mbps
-
Level-3 Rates ~=4.5Mbps
-
Level-4 Rates ~=1.5Mbps
4.6. IPoE Subscriber Accounting for Upstream and Downstream Traffic
Run the "show subscriber" command to view the list of subscribers.
supervisor@rtbrick>C-BNG.rtbrick.net: cfg> show subscriber
Subscriber-Id          Interface        VLAN      Type   State
216454257090494470     ifp-0/1/30       1001:1001 IPoE   ESTABLISHED
ESTABLISHEDsupervisor@rtbrick>C-BNG.rtbrick.net: cfg>
Specify the Subscriber-ID to find the specific subscriber’s accounting details:
supervisor@rtbrick>C-BNG.rtbrick.net: cfg> show subscriber 216454257090494470 accounting
Subscriber-Id: 216454257090494470
    IFL: ipoe-0/1/30/216454257090494470
    Start Timestamp: Mon Apr 03 13:51:18 GMT +0000 2023
    Idle Timestamp: Mon Apr 03 13:51:38 GMT +0000 2023
    Session-Timeout: 0 seconds
    Idle-Timeout: 0 seconds
    Session Statistics:
        Ingress: 28185 packets 27339450 bytes
        Egress: 23990 packets 23990000 bytes
    LIF Statistics:
        Ingress: 0 packets 0 bytes
        Egress: 0 packets 0 bytes
    Egress Class (Queue) Statistics:
        class-0: 4 packets 4000 bytes dropped: 0 packets 0 bytes
        class-1: 19191 packets 19191000 bytes dropped: 0 packets 0 bytes
        class-2: 3 packets 3000 bytes dropped: 0 packets 0 bytes
        class-3: 4792 packets 4792000 bytes dropped: 0 packets 0 bytes
        class-4: 0 packets 0 bytes dropped: 0 packets 0 bytes
        class-5: 0 packets 0 bytes dropped: 0 packets 0 bytes
        class-6: 0 packets 0 bytes dropped: 0 packets 0 bytes
        class-7: 0 packets 0 bytes dropped: 0 packets 0 bytes
    Ingress Policer Statistics:
        Level 1: 5819 packets 5644430 bytes dropped: 31270 packets 30331900 bytes
        Level 2: 8170 packets 7924900 bytes dropped: 29029 packets 28158130 bytes
        Level 3: 10540 packets 10223800 bytes dropped: 26638 packets 25838860 bytes
        Level 4: 3656 packets 3546320 bytes dropped: 33614 packets 32605580 bytes
supervisor@rtbrick>C-BNG.rtbrick.net: cfg>
4.7. Configuring Lawful Intercept (LI)
|
|
This section is still a work in progress. |
5. Appendixes
Appendix A: RBFS C-BNG Configuration
The RBFS C-BNG configuration file (c-bng.json) can be downloaded from here.
-
Click
to download the RBFS C-BNG configuration file.
Appendix B: TACACS+ Server Configuration
The TACACS+ server configuration file (tac_plus.conf) can be downloaded from here.
-
Click
to download the TACACS+ server configuration file.
Appendix C: RADIUS Server Configuration
The RADIUS server configuration files (radius_config.zip) can be downloaded from here. The zip archive contains the set of configuration files needed to configure the RADIUS server.
-
Click
to download the RADIUS server configuration files.
Appendix D: BNG Blaster Configuration
The BNG Blaster configuration file (blaster.json) can be downloaded from here.
-
Click
to download the BNG Blaster configuration files.
The JSON file (isis_3node.json) which is used to simulate R-1, R-2, and RR on BNG Blaster, can be downloaded from here.
-
Click
to download the isis_3node.jsonfile.
©Copyright 2024 RtBrick, Inc. All rights reserved. The information contained herein is subject to change without notice. The trademarks, logos and service marks ("Marks") displayed in this documentation are the property of RtBrick in the United States and other countries. Use of the Marks are subject to RtBrick’s Term of Use Policy, available at https://www.rtbrick.com/privacy. Use of marks belonging to other parties is for informational purposes only.